Key Shank.
After I did the Rogue Key Swap, it eliminated the external keyless fob but it was still not compact enough for what I needed because of the key blade. After seeing the “switchblade key” thread and how it folded for a more compact shape in the pocket, I decided to order one. After a couple of weeks (a lot longer than I expected) the “Switchblade” flip key arrived.
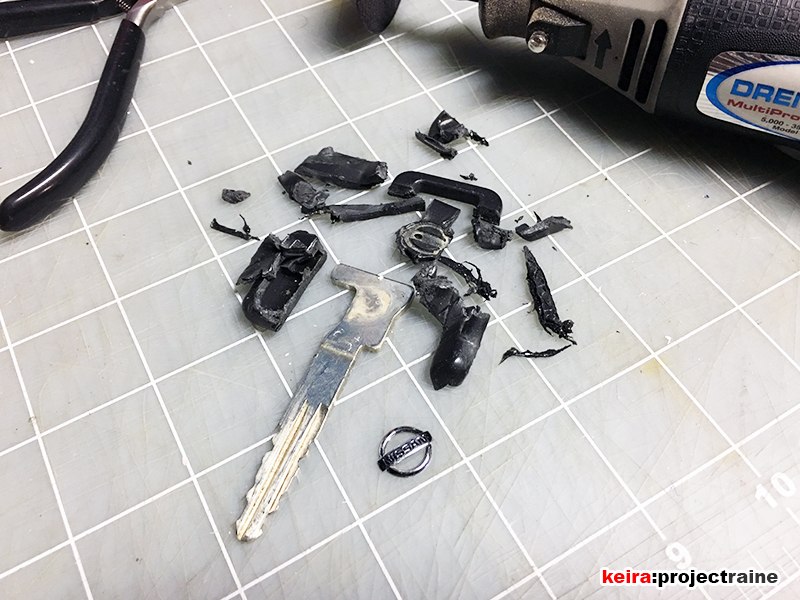
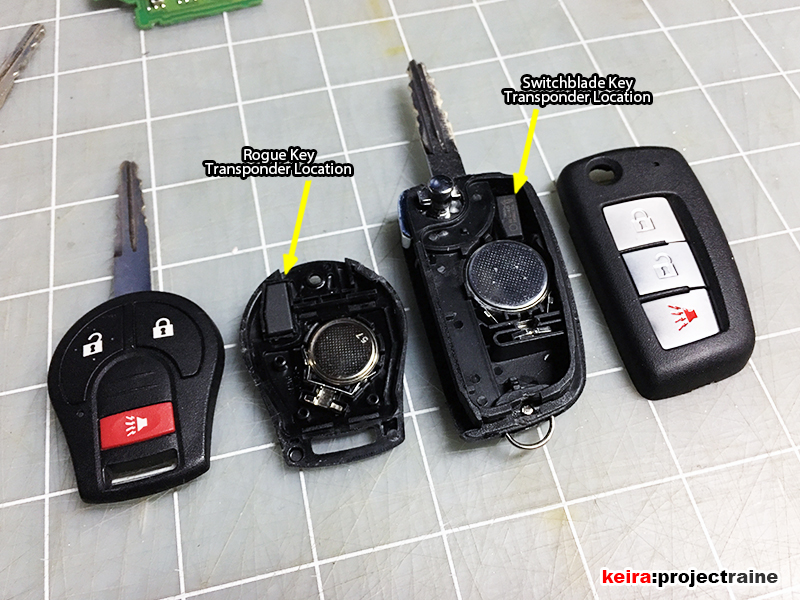
First thing’s first – I needed to figure out the transponder situation, since my truck has the anti-theft built in. I had already used my valet key transponder for the Rogue key, and I didn’t want to have to take a trip to the dealer for programming. Since I had two master keys in storage, I didn’t mind opening up one of them to pull the transponder out. Since the master key was molded around the transponder, I used a Dremel and some side cutters to completely obliterate the master key housing (LOL) and free the factory transponder from inside. If you want to do what I did, pay attention to the next two photos:<

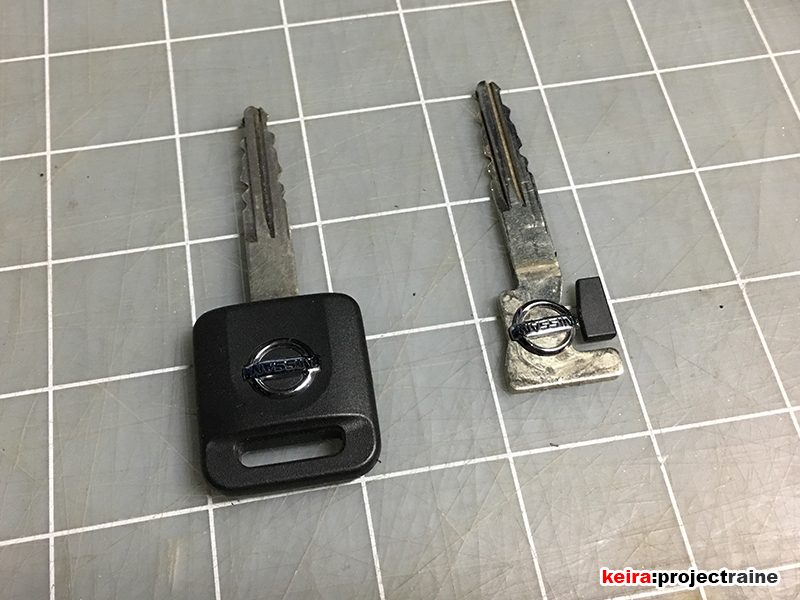
Note that on the photo above, the metal key has a squared cutout on the left; next to it is part of the molded key housing with a cavity – this is where the factory transponder is located. For reference, see the next photo:

If you want to get the transponder out of the master key, this is how everything is positioned. With the Nissan emblem facing up, you can see the side where the transponder is, so trim this side carefully in order not to damage the transponder.
So… from one of my master keys, I had two parts that I needed – the factory transponder (which was already programmed for my truck), and the tiny Nissan emblem. I made it a point not to damage the emblem because after reading elsewhere that people are paying around $20 for it from the dealer, I figured why not use the factory emblem I already had on the master key!
The next day after getting the key blank cut to match my factory key (no charge but I left a $2 tip at Ace Hardware) the rest was easy. The flip key housing doesn’t have a screw holding it together like the Rogue key – simply pop it open with a flatblade screwdriver and you’re in. My flip key also had a dummy transponder inside; I just popped it out and used a small piece of double sided tape to secure my already programmed factory transponder in its place:

NOTE: Both the flip key and my Rogue key had a “transponder” inside when I purchased them. I put that in quotes because I never took them to the dealer to get programmed, so I don’t know if they are actually transponders, or just dummies. Since I was using my own transponders that were already programmed to my truck, I didn’t need to go to the dealer.<
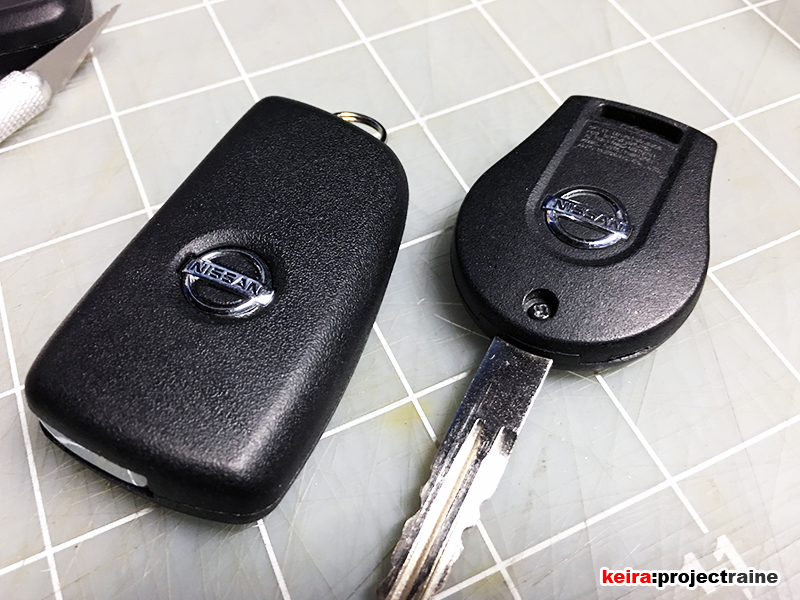
With the physical portion (the key blank) cut and the proximity portion (the transponder) in place, all that was left to do was the programming portion (to “pair” the remote buttons to the vehicle). I used the same method listed in my Rogue key post, and in less than 30 seconds I had the flip key functioning perfectly. As for the emblem, the OEM emblem from my master key was a perfect fit into the flip key housing. I used a small dab of plastic cement, inserted the emblem into the housing, and the process was complete.

After this little project, I now have my OEM master key #1 with OEM external remote fob (kept at home for emergencies); the aftermarket Rogue key with built-in remote (for daily driving); and the new flip key with built-in remote (which folds for easier storage while I’m mountain biking.)