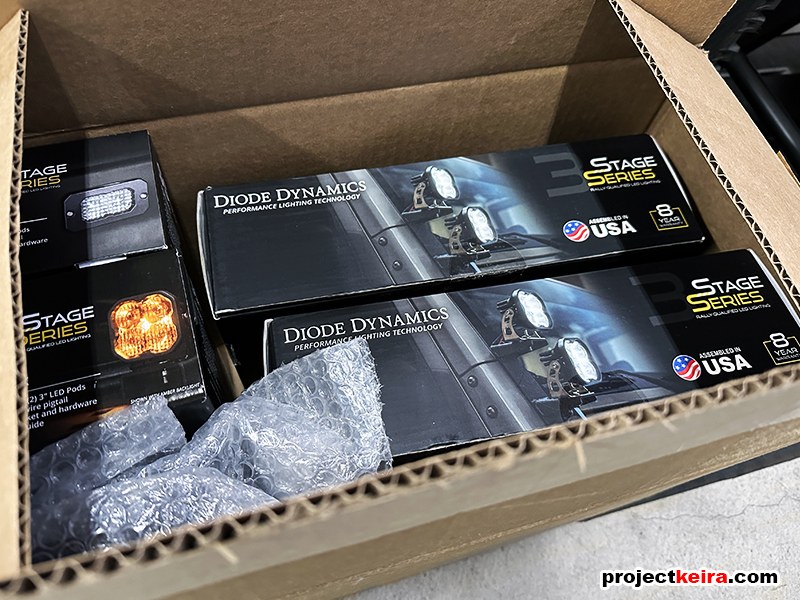
High Lights: Diode Dynamics SS3 Pro Off-Road Lamps
Continuing my lighting upgrade, the next area to tackle was my off-road lamps. Much like how I swapped out my Rigid Industries fog lamps first, for this round of upgrades I wanted to swap out my PIAA 520 ATP halogen off-road lamps for more modern, native LED lighting. So as part of my Diode Dynamics light upgrade it was only natural that I went with a pair of their SS3 Pro Off-Road Lamps:
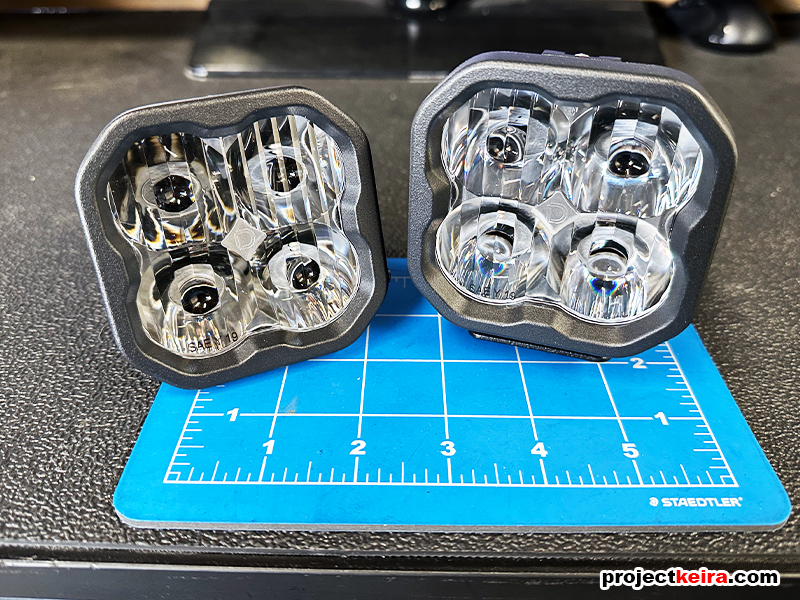
Just like the SS3 LED fog light kit I previously installed, the SS3 Pro Off-Road lamps shared the same features: Diode Dynamics quality, the ease of repair/upgrade, and I can completely change the lamps into a completely different type by simply swapping readily available parts. For this phase of the lighting upgrade, I went with the SAE/High Beam Driving optic in clear, which would give me a beam pattern similar to what I currently had. But before I could get to installing the new lights, I had to take care of what I had installed on the truck – the PIAAs.
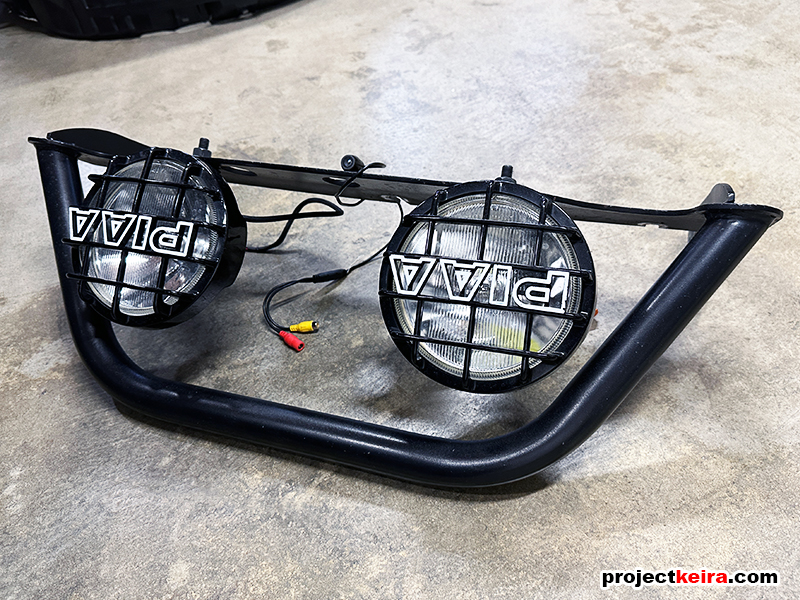
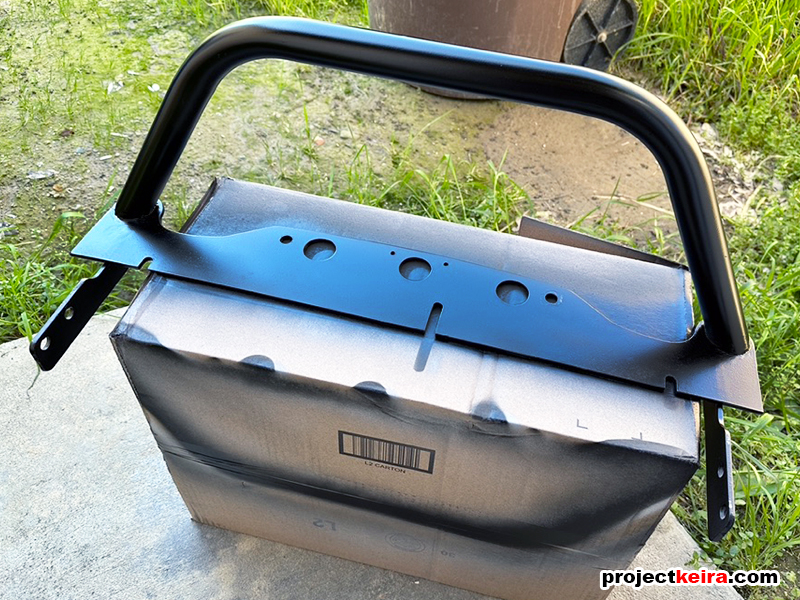
The swap began by completely unbolting the White Rhino bar from the front end of the truck. This first step also gave me a chance to refinish the bar itself, as it had been bolted to the front of my truck for many years now and was showing signs of weather and wear. Here’s the White Rhino bar with the PIAA 520 ATP’s removed from the truck:
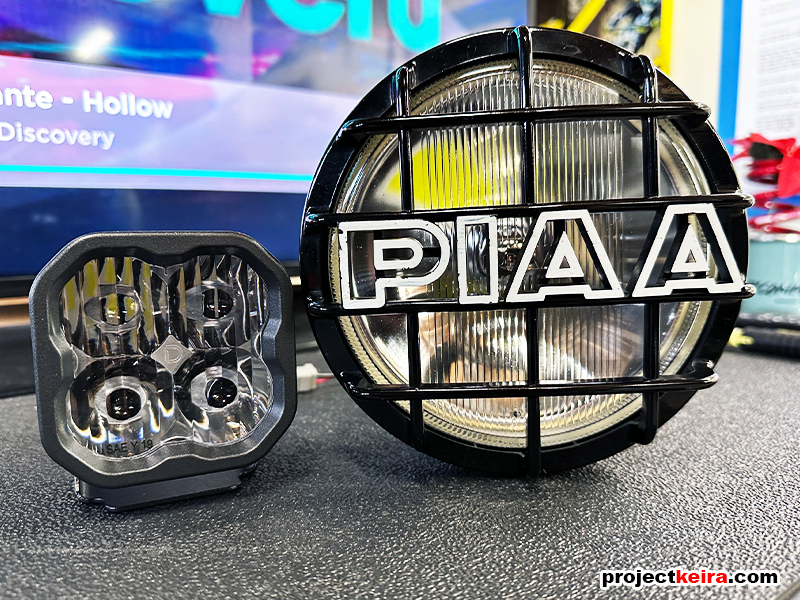
Here’s a look at the SS3 Pro LED lamps compared to the large, PIAA halogen ATPs:
Surely, the smaller size of the SS3 Pros would make it a breeze to swap, right? Well… we’ll get to that later. But for now, I did some mild surface prep and repainted the bar with satin black:
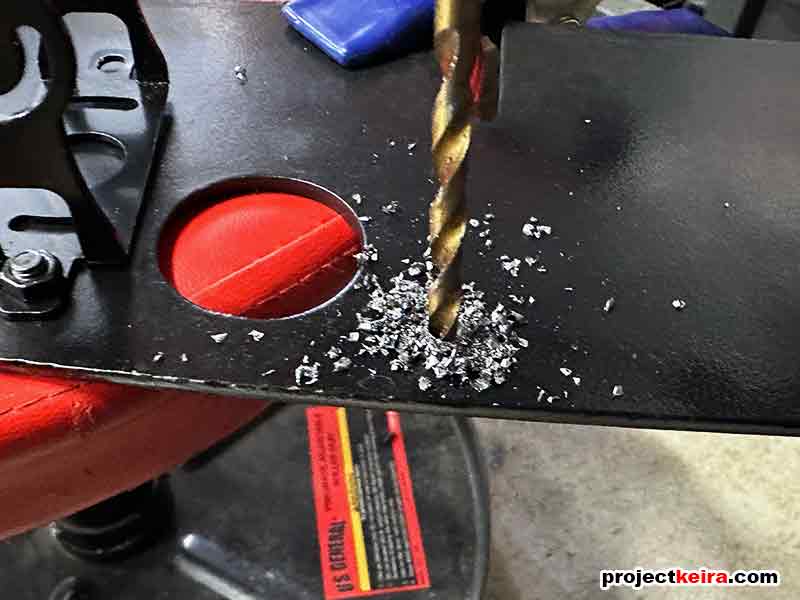
A couple of days later after allowing the bar to dry, I drilled new mounting holes for a new trail camera and test-fitted the SS3 Pros onto the mounting plate:
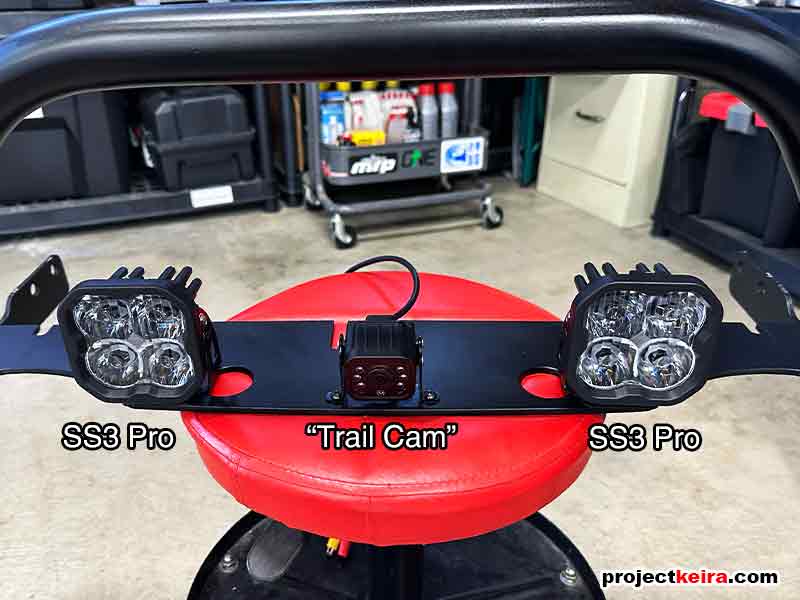
Woohoo it was time to install it! I took the freshly painted White Rhino bar (with new lights and camera installed), went to the front of my truck, lined up the holes, slid the bar back into the bumper opening, and…
…it didn’t fit (!)
Actually… the brackets for the SS3 Pros didn’t fit. Unfortunately, the SS3 brackets sat deeper on the plate compared to the original PIAA brackets, and when I tried sliding the bar back into place the brackets hit the bumper cover:
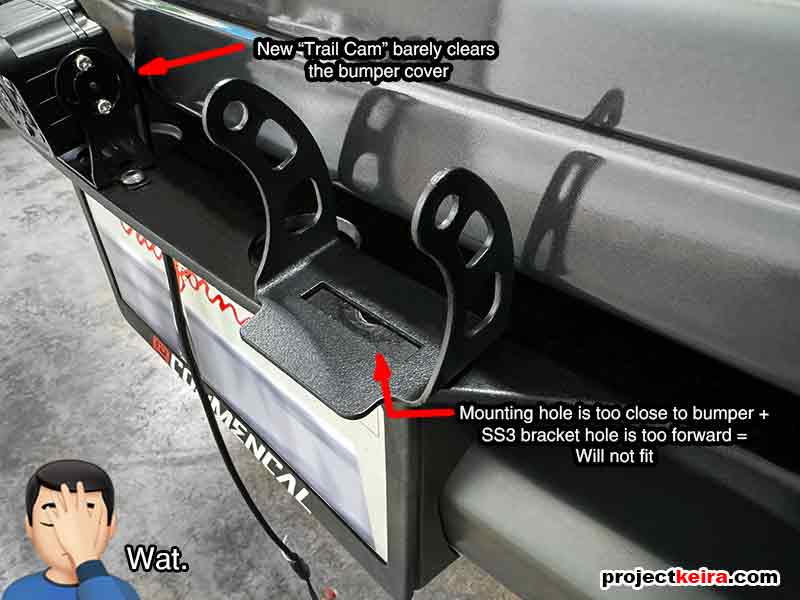
To add to this issue – even if the lamp housings cleared the bumper, the wiring plug wouldn’t since the plugs do not sit flush, and stick out from the back of the SS3 Pro housings:
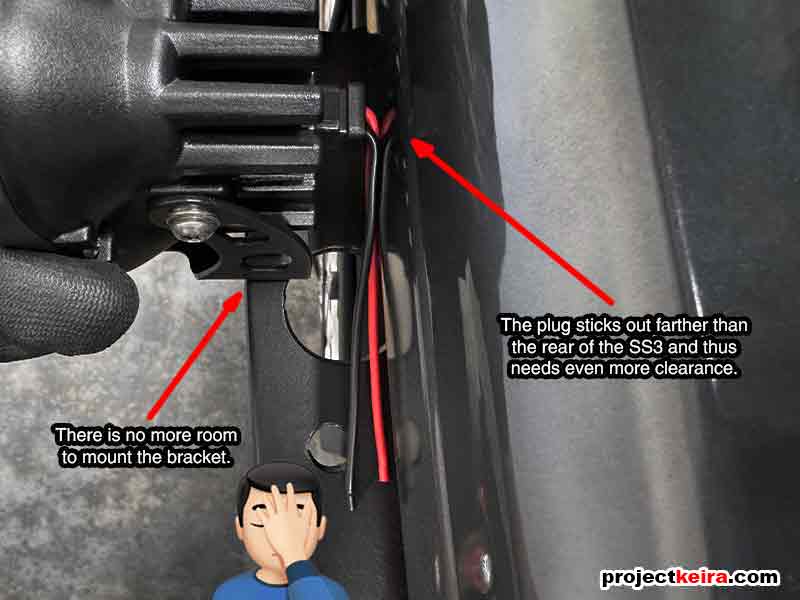
By this point, I was stuck and slightly annoyed. I knew my options were:
- Modify the White Rhino bar mounting holes to accommodate the SS3 brackets;
- Modify the SS3 brackets to match the White Rhino bar mounting holes;
- Cancel the upgrade and re-install the old PIAA 520 ATPs (!)
Trying to modify the White Rhino bar mounting holes was not feasible because there was not enough room on the flat area of the bar to drill new mounting holes that large. Likewise, the only way to modify the SS3 brackets to fit required slotting the current mounting holes, which would compromise the mounting of the bracket. I was determined to figure out an alternate way to mount these SS3 Pros when I remembered how other members mounted fog auxiliary lamps in the lower bumper opening using existing fastener holes. Coincidentally 2 of the 6 fasteners I used to mount the White Rhino bar were in the same holes, so I removed the bolts and test-mounted the SS brackets underneath:
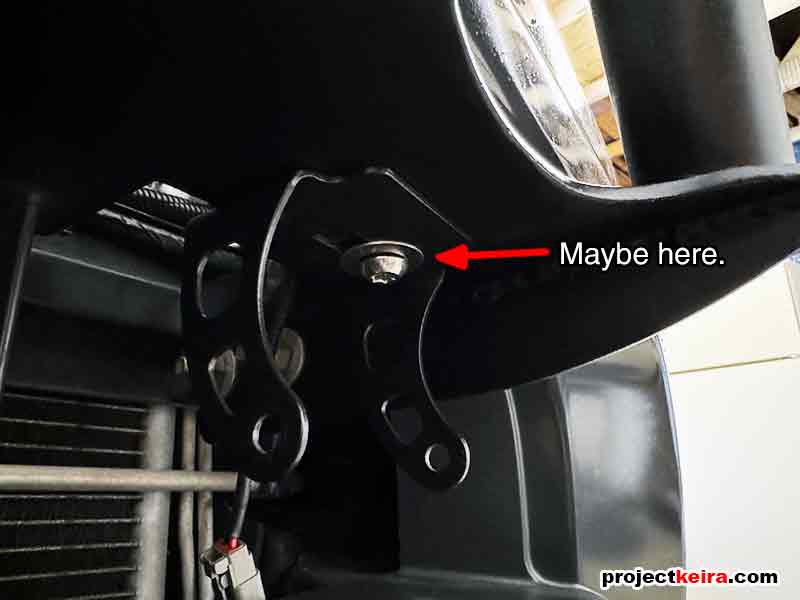
…followed by bolting on the SS3 Pros to see what it looked like:
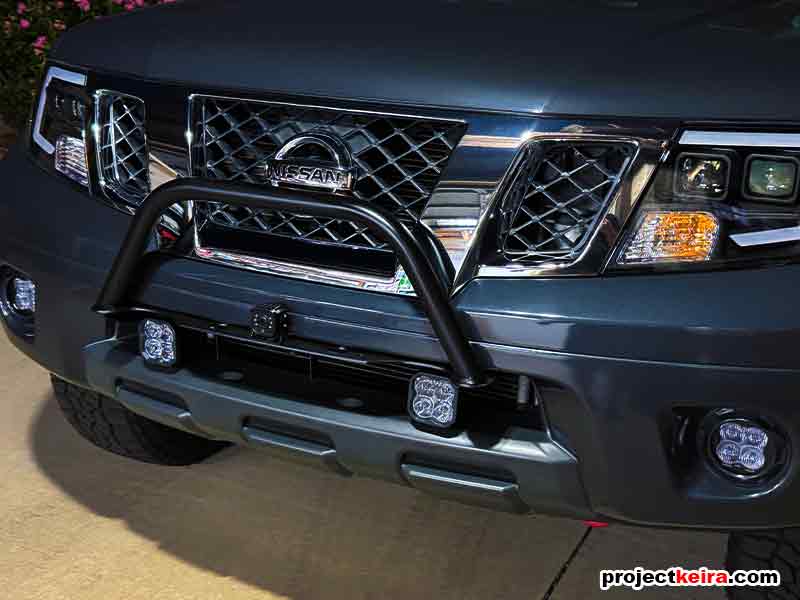
After this, I called it an evening, but for some reason, I wasn’t entirely convinced that I was happy with the SS3 Pros locations. In an earlier post (after the initial install but before now) I commented on the install location, and some of my exact words were:
“…I almost feel like I should finally get rid of the White Rhino bar and just keep the off-road SS3s in the lower bumper opening.”
I think part of my dilemma was because the intended purpose of the White Rhino light bar – the bar was there to brush away anything that could hit the previously installed PIAA lights since the PIAAs were protruding forward beyond the front bumper. With the SS3 Pros mounted down below in the lower bumper opening, they no longer stuck out forward past the bumper cover. Also, with the SS3 Pros down below, the new, larger, easier-to-notice trail camera was just there by itself on the old light mounting plate.
The next morning I decided to keep the SS3 Pros there for now as maybe the location would grow on me. That meant I had to do three more things before this mod was complete. The first was to remove the stock Diode Dynamics mounting hardware (1x 5/16” carriage bolt and 2x 10/32” SHCS bolts) and replace them with tamper-proof bolts:
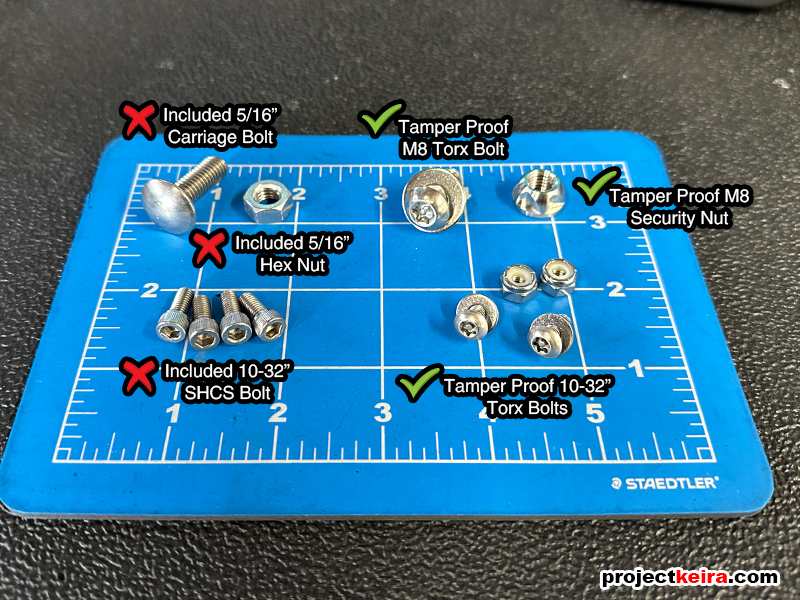
Unlike the SS3 Pros installed in the OEM fog lamp locations (which need more disassembly to get to), these SS3 Pros have easier-to-access mounting hardware. Reinstalling the lights with tamper-proof bolts is not a 100% guarantee they can’t be stolen – but at least the non-standard security hardware should help deter most “crimes of opportunity.”
The second thing to do was extend the existing wiring harness I made for the PIAAs to reach the SS3 Pros, including a new DT 2-pin plug:
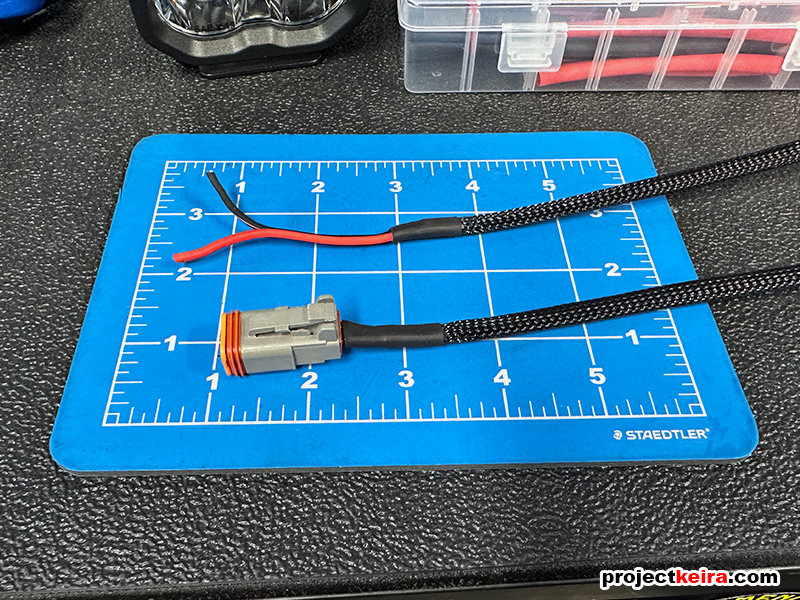
Finally, the third thing to do was to aim the SS3 Pros. I didn’t take photos of this because it was quick and easy, so I’ll just describe it: later that evening at a nearby industrial area (lots of perpendicular walls!) I positioned the front of my truck about two truck lengths away (roughly 30 feet or so). I turned on my fog lamps first to see how high their beam was on the wall. Next, I turned on my headlight low beams and checked at how high those went on the wall. With that in mind, I adjusted the SS3 Pros so that their beam was spaced above the headlamps with about the same spacing, so you can call the aim of my SS3 Pros “higher than high beam”.
It’s now about 3 months or so since I installed this set of SS3 Pros, and they are still in the same location:
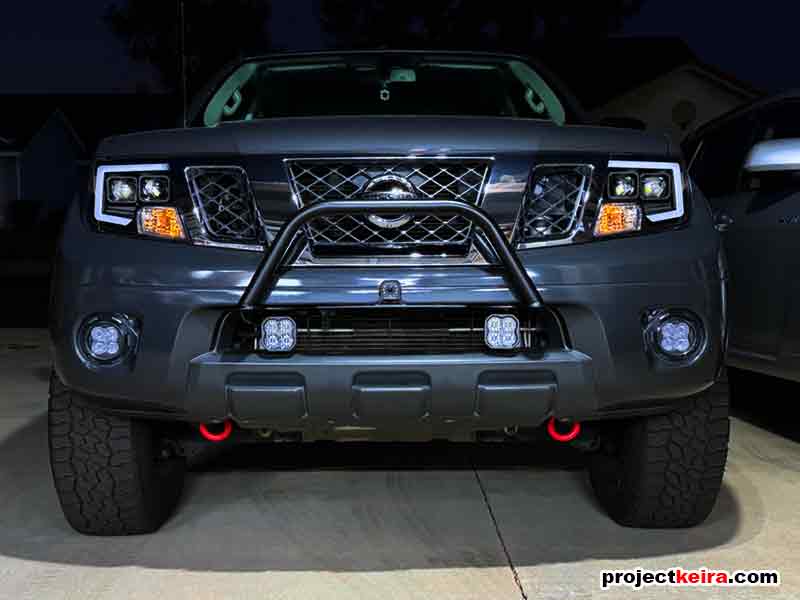
…so I guess that means I’m not bothered anymore about the locations – thus we can call this a complete mod. However, in the grand scheme of my lighting revisions, I still have one more upgrade to do… and it’s in this box, somewhere:
