How-To: Diode Dynamics Interior LED Conversion Kit For 2005-2021 Nissan Frontier
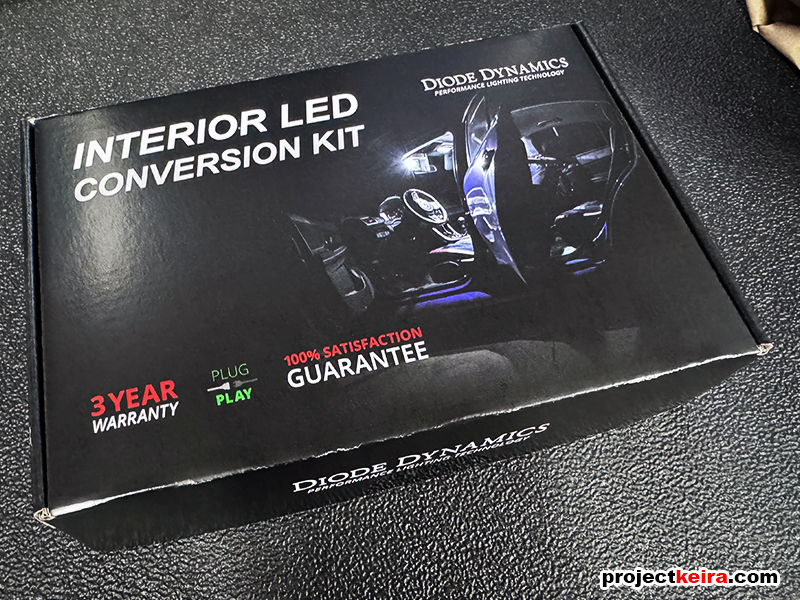
My left map light LED started to flicker a few weeks ago and I had yet to order a replacement from Amazon (where I bought the current bulb) when I saw a forum post from the friends at Diode Dynamics advertising their new Interior LED Conversion Kits. Hopping over to the Diode Dynamics website, I took a look. For the 2005-2021 Nissan Frontier, Diode Dynamics offers two versions of the kit: a Stage 1 and Stage 2 set. The Stage 1 package ($27 + tax + shipping) comes with bulbs rated at 24/56 lumens per bulb (interior/exterior); the Stage 2 package ($50 + tax/shipping) comes with brighter bulbs rated at 130/92 lumens per bulb (interior/exterior). Both sets are 6000k “cool white” in color temperature.
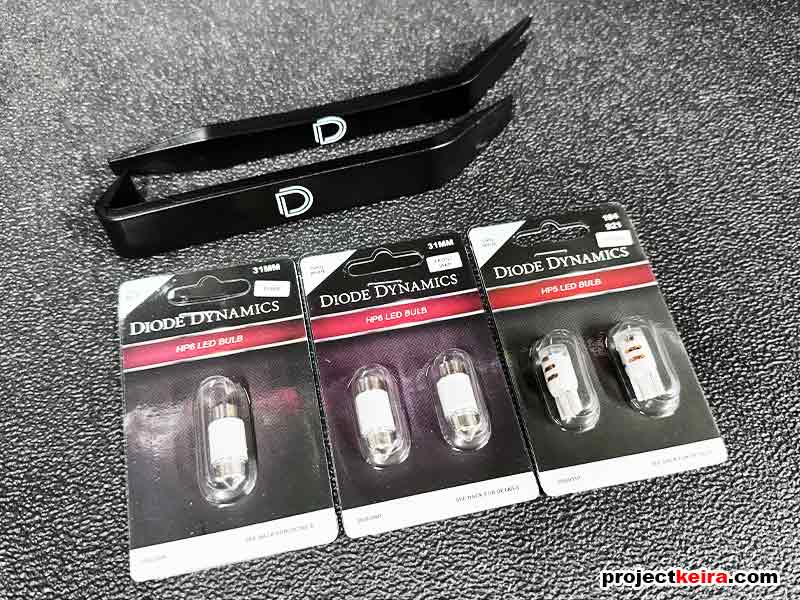
Thanks to a free shipping discount code, I made the purchase and went with the brighter Stage 2 package. Upon arrival I opened the box to find 3 packages of LED bulbs: three 31mm “festoon” type LED bulbs for the forward map lights and the rear dome lamp, and two 194-style LED bulbs for the license plate lights – which… aren’t really “interior” but that’s okay. The kit also included a two-piece set of branded plastic trim removal tools, a decal sheet, and some paperwork. The box was way too big for the contents:
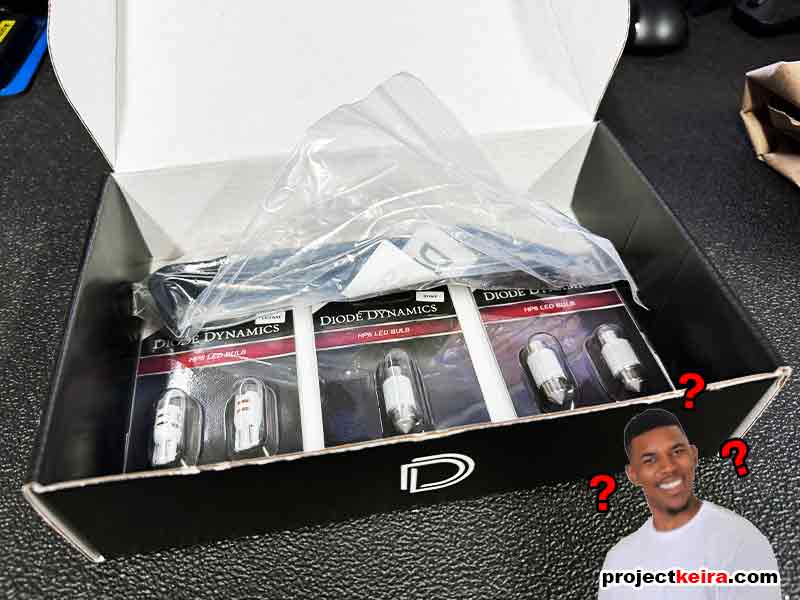
…look at all that empty space! I get it – it’s a universal retail box and other vehicles may have more bulbs required… but I just thought it was amusing how large of a box they used for 5 small LED bulbs. But we’ll get back to this later.
Anyhow, here’s everything you need including the plastic trim removal tools:
The Diode Dynamics website has a somewhat generic guide to installing LEDs, but I thought I’d show how it’s done in an actual 2005-2021 Nissan Frontier. Even if this is a relatively basic mod, it is still a mod and those who are new to upgrading should (hopefully) find this helpful. So that said, please follow along as I install the new Diode Dynamics LED bulbs into each location =)
Tools Needed
– None; if you don’t already have some plastic panel removal tools, two of them are included. The plastic panel removal tool is what you want to use; many people will opt to just use a metal flathead screwdriver instead, and when it comes to prying plastic (especially stiffer, more brittle light lenses) one can easily do damage with metal tools.
A. LED Install – Front Map Lights
Of the three locations we’ll be working with, the front map lights are the most difficult to do; it’s not that the procedure itself is difficult, but if this is the first time you’ll be working with the map light area, there are a few small details to pay attention to.
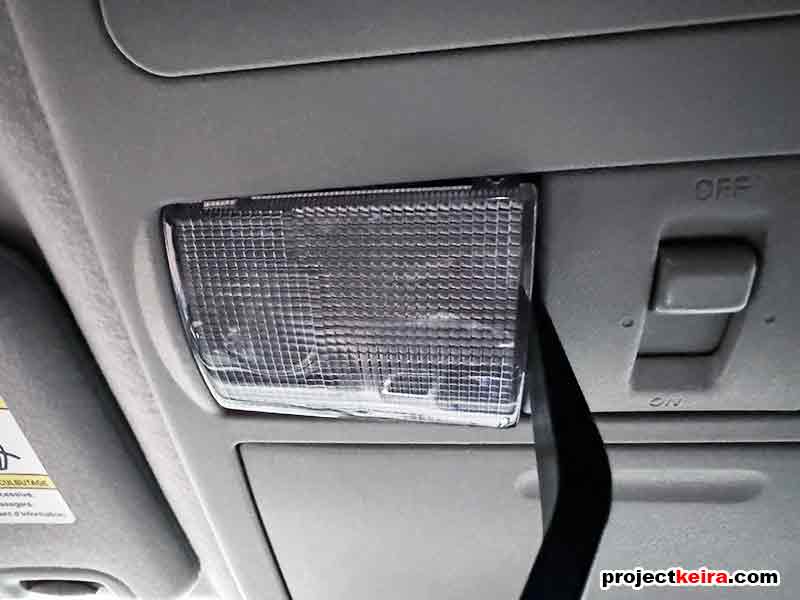
STEP 1: Pry from the inside edge of the lens, not the outside.
As shown in the photo below, to remove the map light lenses use a plastic trim removal tool and gently pry from the inside edge of the lens, near the ON/Door/Off switch:
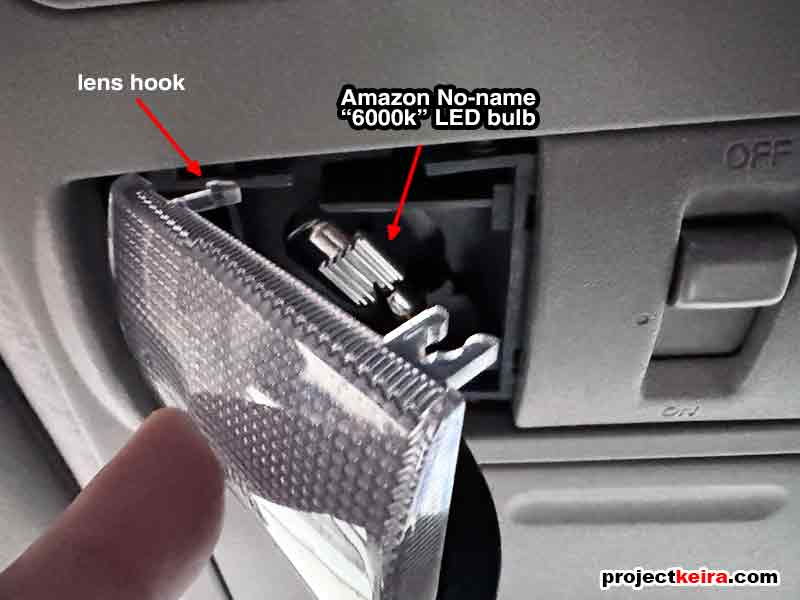
STEP 2: Carefully remove the lens, and be aware of the plastic hooks.
When the lens disengages from the housing towards the inside, be aware that towards the outside of the lens, there are two narrow “hooks” that can be easily broken if you just yank the lens out. Instead, allow the lens to rotate downward so that the hooks can disengage, allowing the entire lens to be removed:
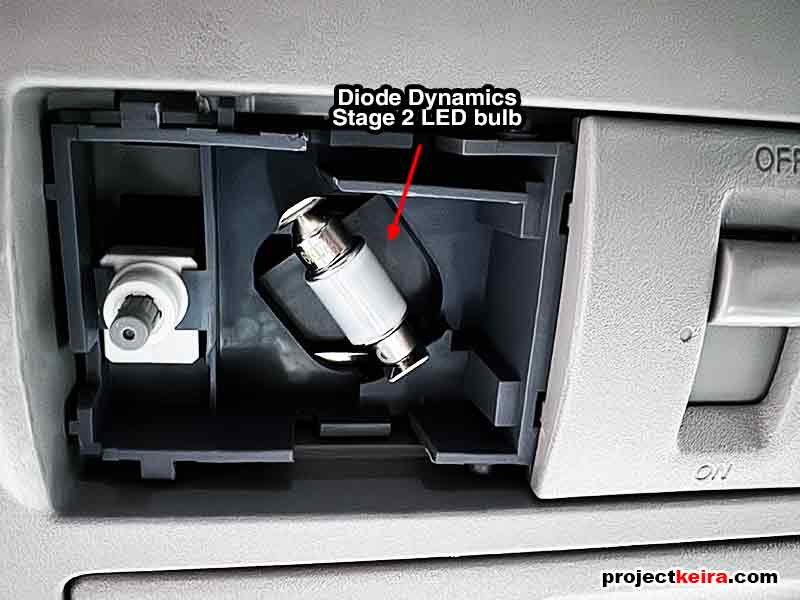
STEP 3: Swap to the Diode Dynamics LED bulb.
Now that you have access to the map light bulbs, swap them out one at a time. The Diode Dynamics Stage 2 bulbs have a metal pointed tip at the ends; make sure these go into the holes of the metal tabs in the lamp housing:
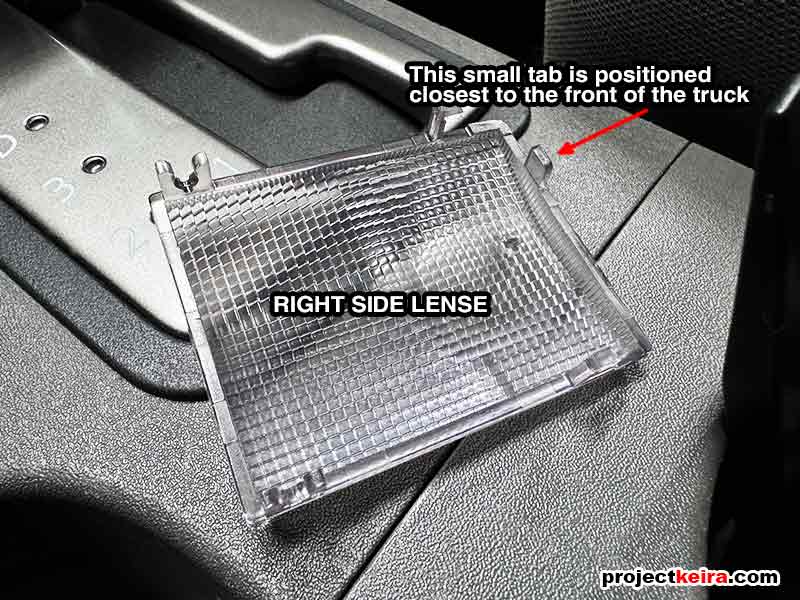
TIP: In case you mix the lenses up
The left and right map lenses are not interchangeable; the left lens will only fit properly on the left lamp, and the right will only fit on the right. If you took both lenses off at the same time and forgot which is which, here’s a trick to figure it out: On the side of the lenses where the “hooks” are, there is a small plastic tab sticking upward. This tab must be closest to the windshield, towards the front of the truck. So the left lens will have the tab on the left side toward the front of the vehicle, and the right lens will have the tab on the right side toward the front of the vehicle, as shown below:
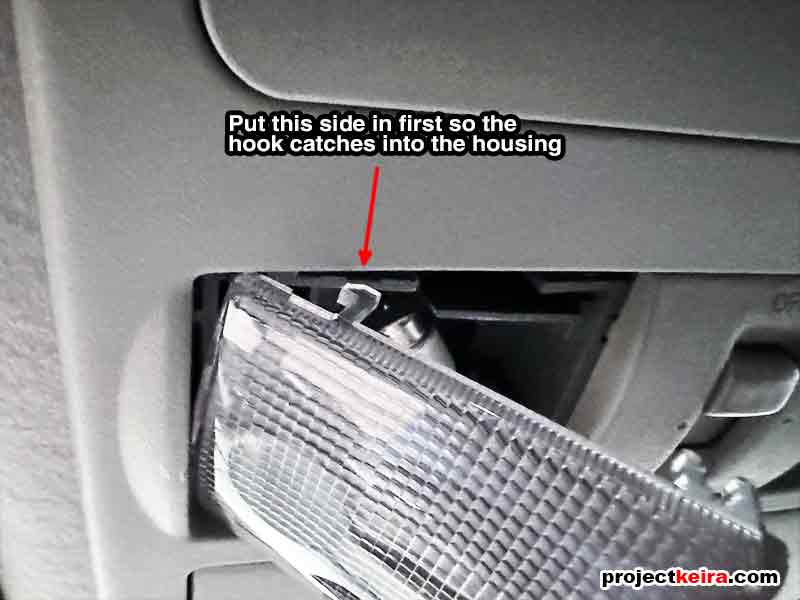
STEP 4: Reinstall the map light lenses.
Angle the lens like how it was when you removed them. Make sure the hooks are toward the outside of the housing. For the left-side lamp, slide the left side of the lens into place, then gently push up on the right side of the lens to snap it back into place. Repeat the opposite for the right-side lens:
On tot he next one.
B. LED Install – Rear Dome Light
Moving to the rear of the cab, swapping out the dome light bulb is so easy that it’s practically self-explanatory. There are no special tricks needed here, it is very straightforward and should only take a minute.
STEP 1: Remove the dome light lens
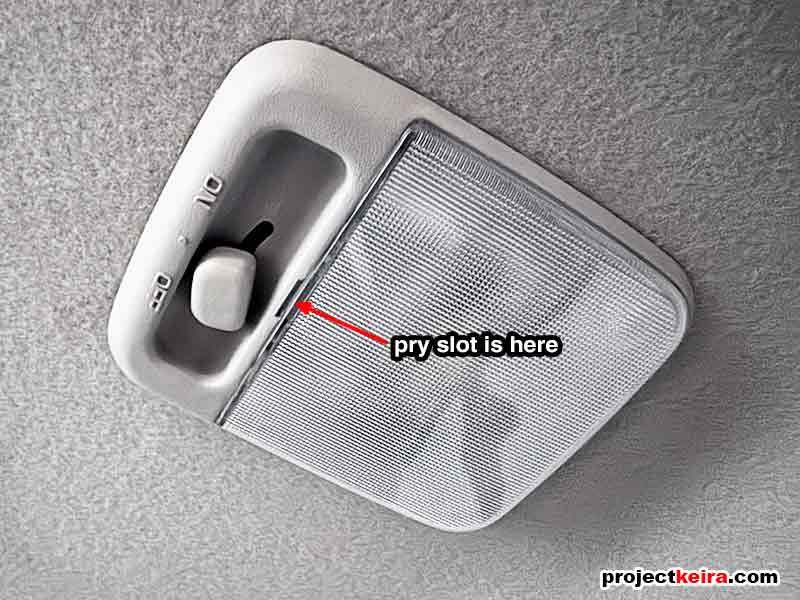
Using a plastic trim removal tool, insert the tip of the tool into the small slot at the forward edge of the dome light lens. Pry gently and the dome light lens will simply pop off from the housing, giving you access to the bulb:
STEP 2: Swap to the Diode Dynamics LED bulb.
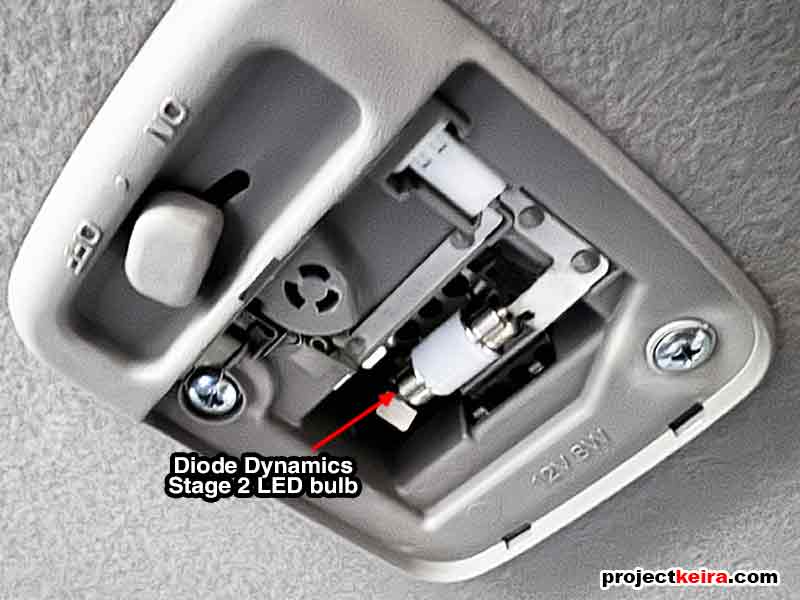
Now that you have access to the dome light bulb, swapping bulbs is exactly the same as with the map lights… because it is the exact same bulb going in this location! Remember – the Diode Dynamics Stage 2 bulbs have a metal pointed tip at the ends; make sure these go into the holes of the metal tabs in the lamp housing:
STEP 3: Reinstall the dome light lens.
Angle the position of the dome light lens like how it was when it popped out, making sure that you have the two small tabs lined up at the rear of the dome lamp housing. Then simply press the dome light lens upward and back into place.
Let’s move on to the last bulb upgrades.
C. LED Install – Rear License Plate Lights
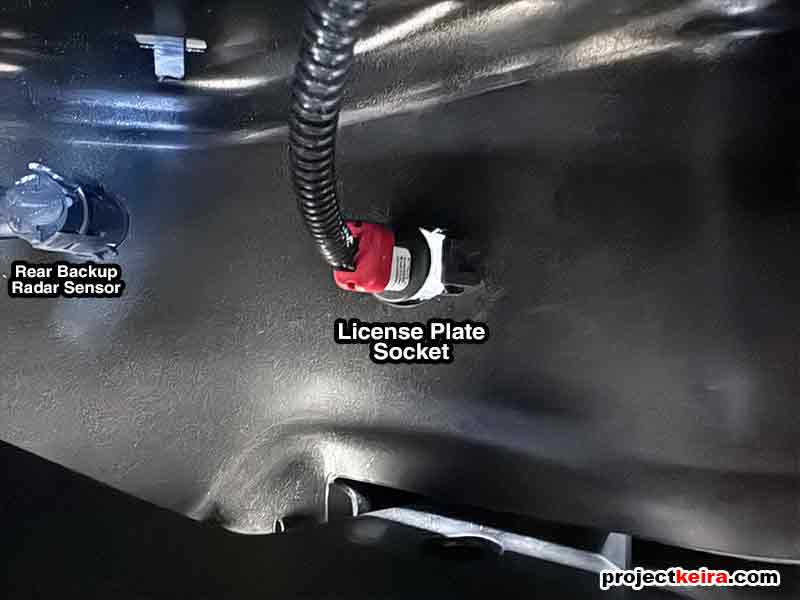
Finally, we get to the rear license plate lights. Swapping these bulbs requires no tools at all; however, it does require you to slide underneath the rear bumper to get to the bulbs. When looking underneath you should easily be able to identify the license plate bulb holders behind the rear bumper; if you have a tow hitch, you can still access the bulb holder but you won’t easily be able to see it due to the hitch blocking the view. Here’s what it looks like behind the rear bumper:
STEP 1: Remove the license plate bulb holder.
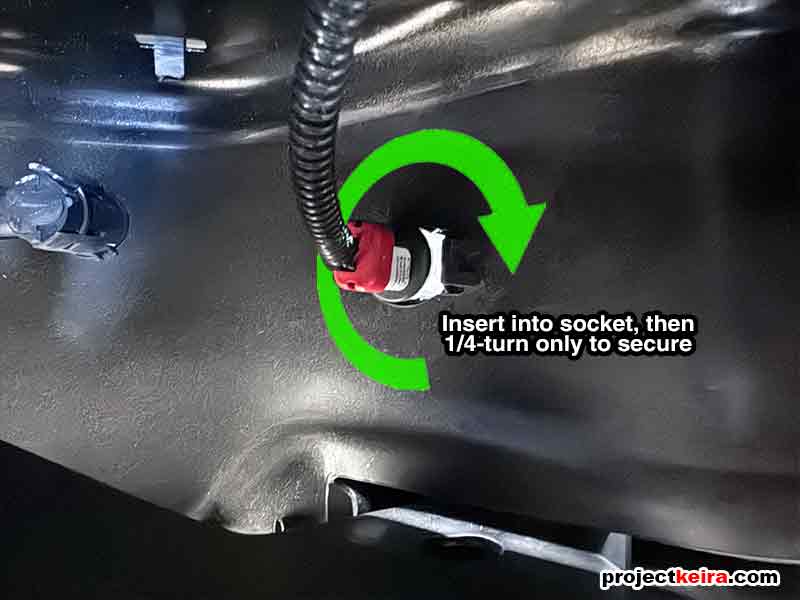
To remove the bulb holder, simply hold the socket in one hand and rotate it about 1/8 of a turn counter-clockwise to unlock it. Then pull straight out and the bulb holder will come out of the lamp:

STEP 2: Swap to the Diode Dynamics LED bulb.
Swapping the bulbs in this position is as easy as pulling out the old bulb and pressing in the new Diode Dynamics LED bulb in its place:
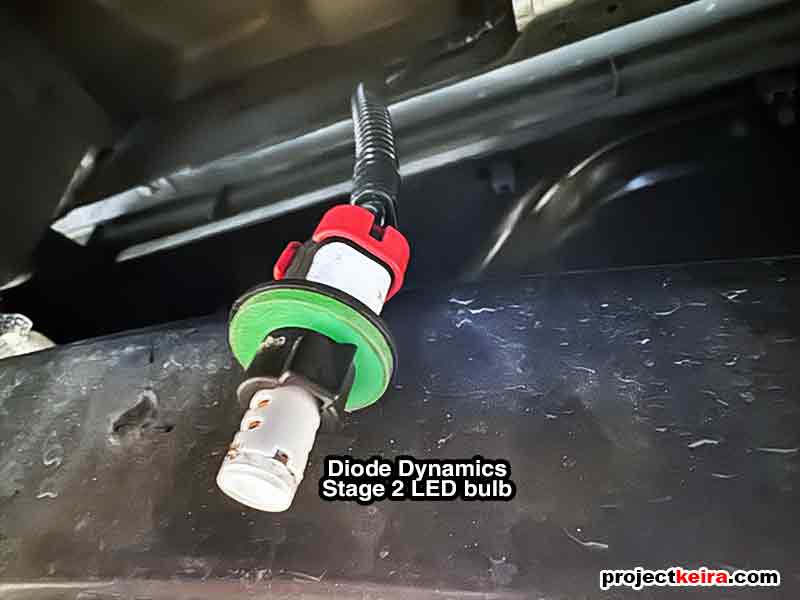
STEP 3: Reinstall the bulb holder into the license plate light housing.
To reinstall the bulb holder, just do the opposite of removal: push the bulb holder into the lamp housing, then rotate it clockwise about 1/8 of a turn so that it locks into place. That’s it:
The upgrade is complete!
Soooo… How Do They Look?
For the interior bulbs, there was a definite difference in brightness between the no-name Amazon LED bulbs I used to have when compared to the new Diode Dynamics LED bulbs I just installed. As the photos show below, the overall light output was not just brighter, but it was also more even:
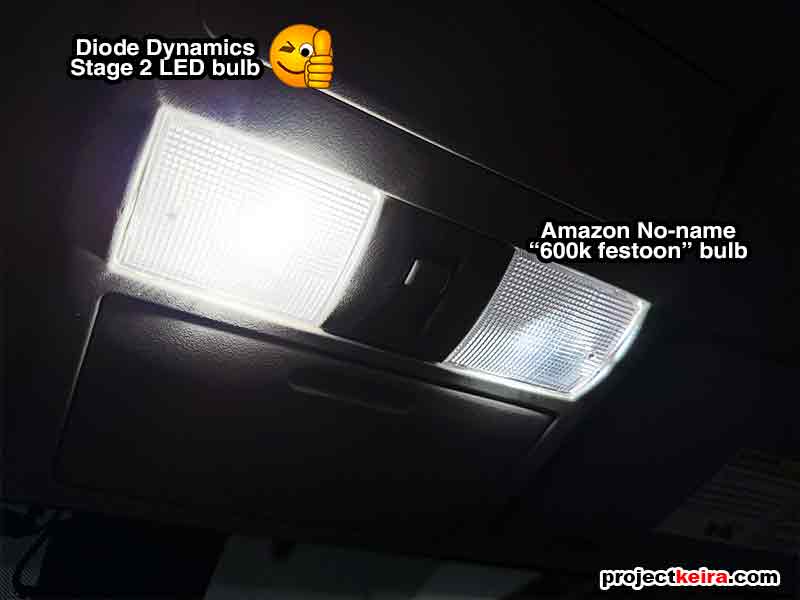
…and a look at the rear dome light:
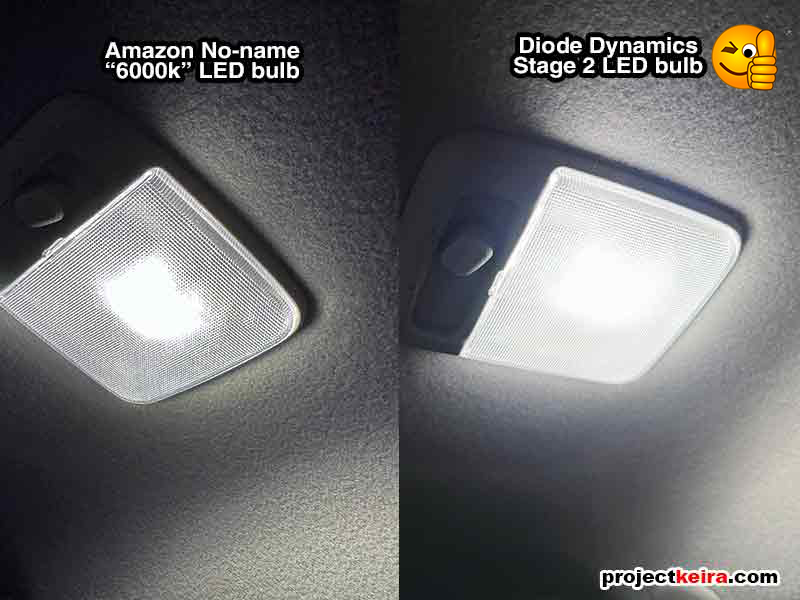
Notice how the old bulbs weren’t as bright, and the light was focused near the center of the lens. However, the Diode Dynamics LEDs gave a brighter light that is dispersed wider across the whole lens; this is thanks to the built-in frosted LED cover, that helps spread the light and eliminates “hot spots.”
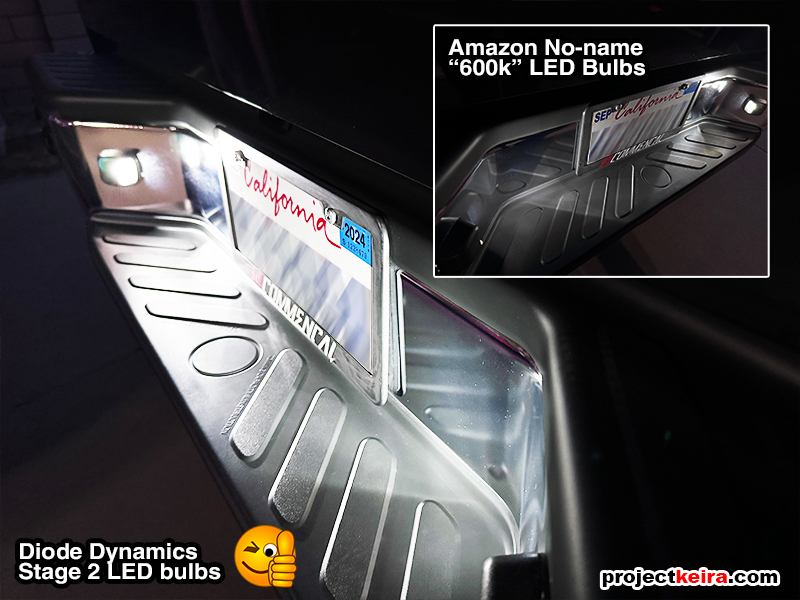
As for the license plate lights, take a look at how bright the Diode Dynamics bulbs are compared to the previous LEDs; these two photos were taken within 5 minutes of each other (a testament to how easy it is to swap these bulbs):
Conclusion, Things To Know
So there you have it – the Diode Dynamics Stage 2 LEDs are installed, and good to go. I like how everything you need is included in the kit, and as far as I’m concerned the pricing is reasonable for high-quality LED bulbs. Having two “Stages” offered means that even those on a budget can still upgrade from the OEM halogens, but if it were up to me I would recommend going with the Stage 2 package. The amount of usable light from these LEDs is much better for sure, making this a good mod for any Frontier owner. Note that I said “usable” – because I am particularly referring to how good the light is diffused; there are no hot spots like with my previous LEDs.
The Diode Dynamics Interior LED Conversion Kit For 2005-2021 Nissan Frontier is a quick and really easy way to upgrade the dim OEM halogen interior lighting to brighter LED with brighter and more uniform light coverage – all in about 10 minutes tops. I am happy with the results and would recommend this kit to anyone looking to improve their Frontier’s lighting.
EXTRA: Now about shipping…
One thing I mentioned was that I used a free shipping code promo when I ordered the Stage 2 package… and you’re going to want to do the same thing. Why? Remember how I mentioned earlier how large the retail packaging was for such a small amount of LEDs? Well, to expand on that: the Diode Dynamics retail box (what is shown above) was shipped inside another, much larger brown shipping box. This wouldn’t be an issue, if it weren’t for the fact that retail box only occupied about 35% of the internal space of the brown box – and the rest was stuffed with packing paper! Diode Dynamics also ships via UPS, and UPS calculates by box size, not just weight.
The result is that the actual shipping charge is about $14 – but here’s a tip for you: if you are a member of Club Frontier, Diode Dynamics offers a free shipping code to all Club Frontier members. Get the code, save $14 just like that, OR if you were just buying the Stage 1 kit you can apply those savings and go with the better, brighter Stage 2 kit!