Drill’ em and Slot ’em.
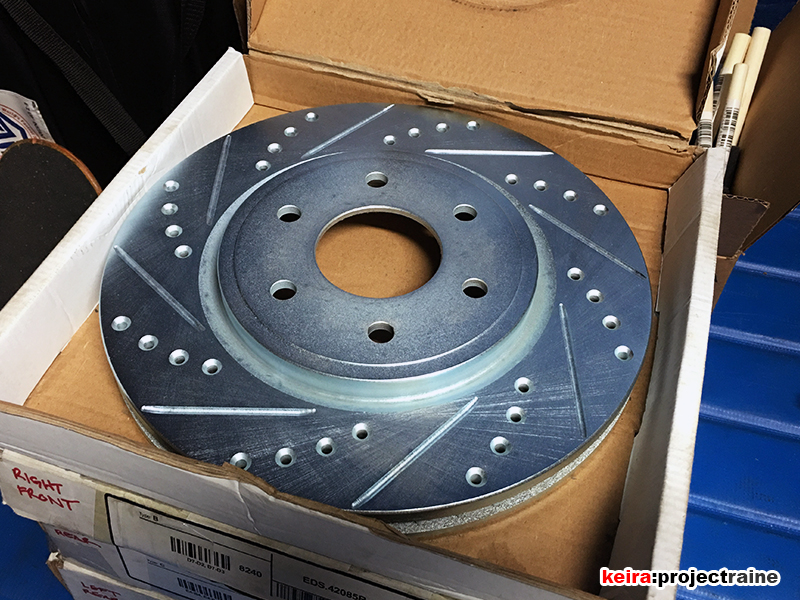
After looking at the photos I took at Bonelli I felt like there was something missing with my wheel and tire upgrade, so I decided to add a couple more things to the project – rotors and paint. I have this thing for red calipers – my last 3 cars all had red calipers – so I ordered a complete front and rear set of R1 Concepts Drilled and Slotted brake rotors. I raised the truck up on jack stands and pulled all four wheels and got to work.
At the same time I also ordered a Rustoleum Caliper Paint Kit. The Rustoleum kit includes a can of paint, one spray can of caliper cleaner, a small brush and a small roll of masking tape. I added two more rolls of masking tape, a few more cans of brake cleaner I had in the garage, and some extra brushes to the mix to ensure I had everything I’d need.

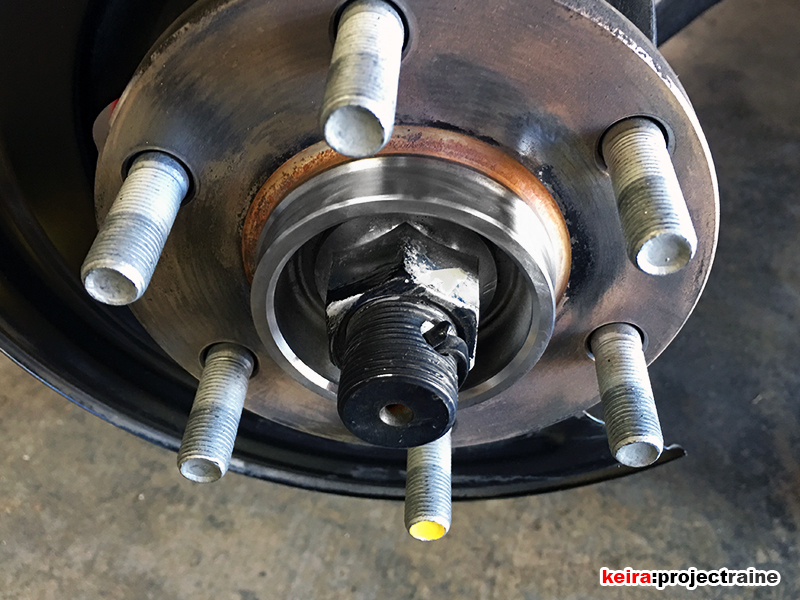
After unbolting the brake calipers and removing the OEM brake rotors, I cleaned the area with brake cleaner. The first thing I did was remove any signs of dirt or rust on the visible part of the hubs with my Dremel.
With all four hubs clean, it was time to paint. I started with the rear half of each caliper, painting on a thin coat of caliper paint on one, then rotating around the truck to paint the other calipers. I did not rush, allowing enough time in between coats to allow the paint to dry before adding more paint.
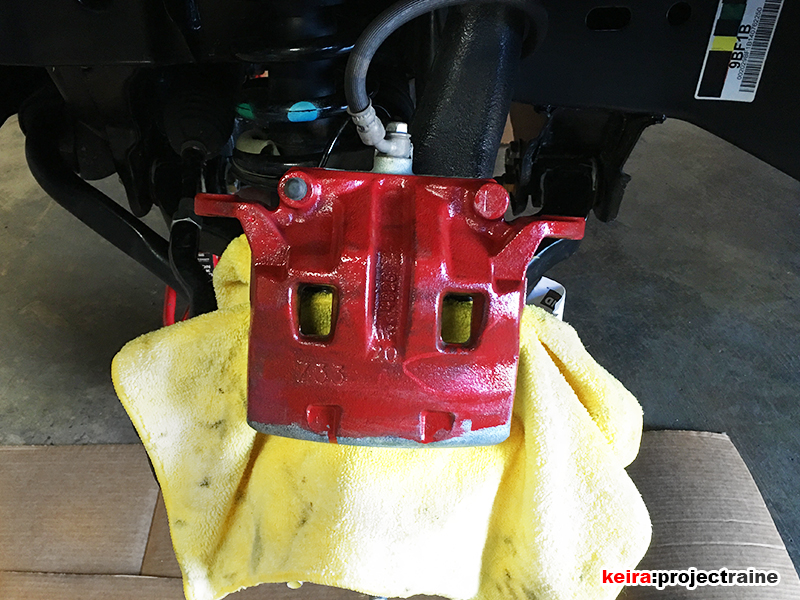
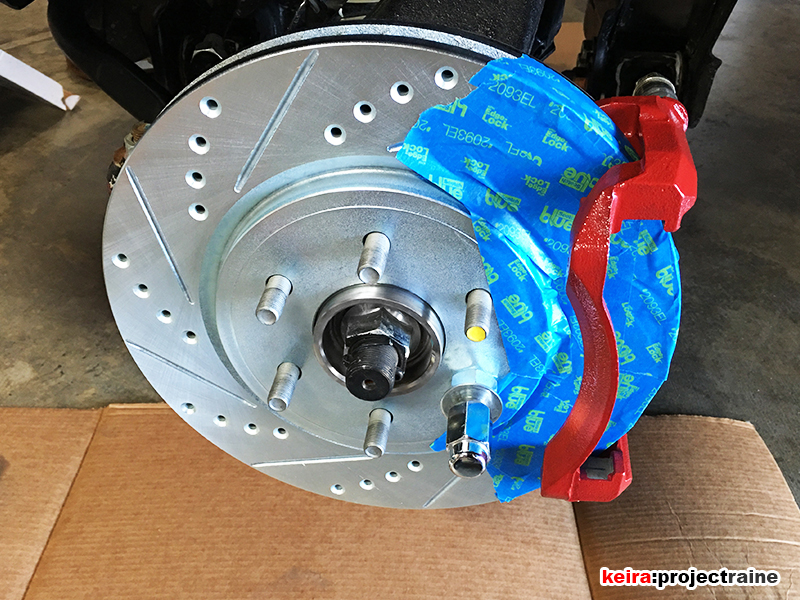
I went with 6 coats on each caliper before the red looked bright and solid just like I wanted it; including drying time it took a few hours. Next came the brake caliper mounting brackets; since the rotors had to be in place before the brackets, it was time to put the R1 rotors on. I then bolted up the caliper brackets, used some masking tape to protect the new rotor surfaces, and painted the brackets.
One thing that made the job efficient and fairly quick was how I used a piece of cardboard to carry the paint and brushes around with me as I rotated around the truck while applying the paint layers.

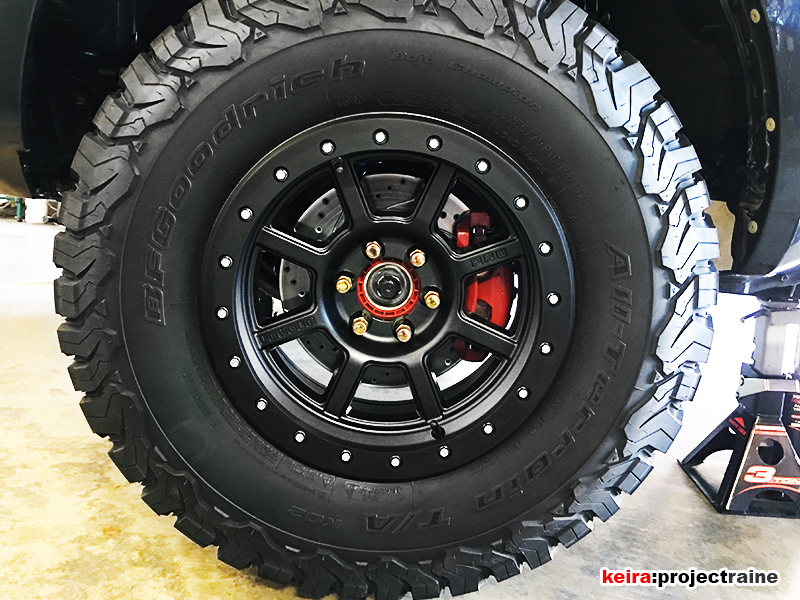
After finishing the paint job, I installed the wheels to break in the pads. (The two photos below are midway through break-in.)
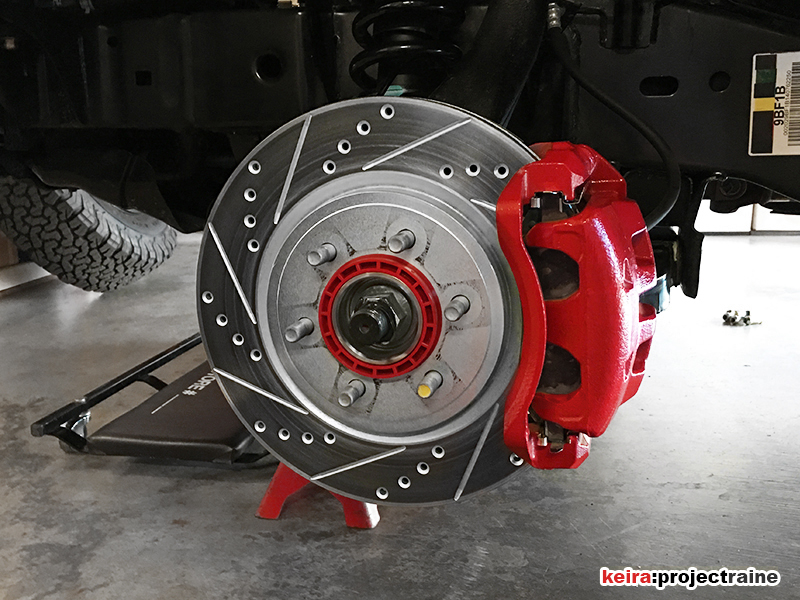
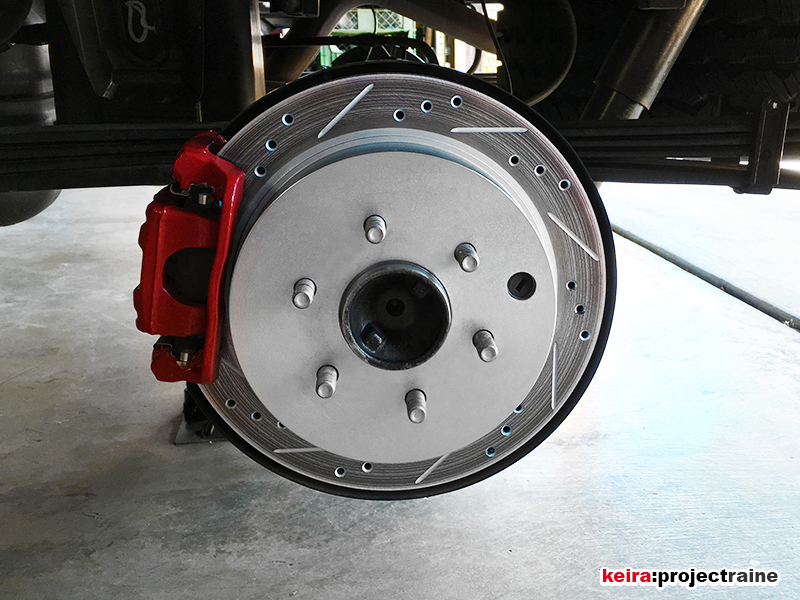
To be honest, I did not notice any significant increase (nor decrease) in braking power or feel, if anything braking felt slightly better but I can’t back that up with anything on paper. That’s okay – the brakes are still quiet like OEM and I am definitly happy with how the rotors added to the look of the truck.