Self Control: OEM-style DRL Switch
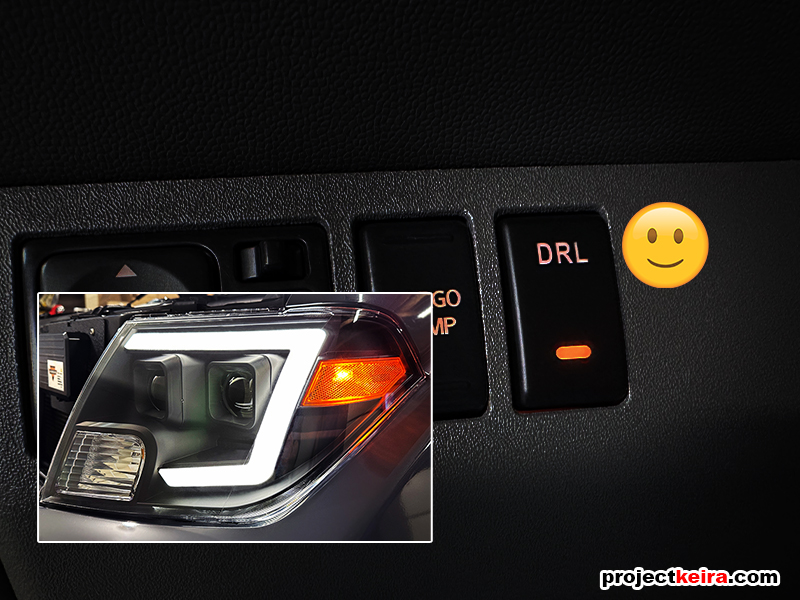
Normally with the Akkon DRL Projector headlights installed, one could just turn the parking lights to “ON” and the C-DRL would light up like shown below; however, when turning on the parking lights two other things happen:
- Other interior lights turn on…
obviously the gauge cluster backlighting, interior switch lighting, and taillights will also turn on, because that’s how the OEM light stalk works; however… - …I can’t easily read the screen
More importantly for me – when the parking lights are switched on, my head unit switches the screen color scheme from “daytime mode” to “night mode”. Night mode lowers the screen brightness and flips the color scheme to a darker, easier-to-read-at-night interface, which actually does the complete opposite during the day and makes it harder to read when it’s bright outside!
So, if I wanted to turn the DRLs on during the day (I mean, they’re called DAYTIME Running Lights for a reason, right?) I knew I had to mod the wiring on the Akkon headlamps to isolate the C-DRL portion + come up with a way to be able to turn the C-DRL on independently of the rest of the vehicle’s parking light function. I also wanted to retain the ability to switch the DRLs on and off at will, so that would require an actual separate toggle switch. After brainstorming a few ideas, I went to the Internet and eventually came across an item that finalized the solution: an aftermarket OEM-style DRL push button switch:

The DRL switch was not a “universal type”, but one designed to be a perfect match for the 2nd-gen OEM Nissan Frontier. The aftermarket DRL switch matches the shape, texture, and styling of the OEM switches that are found on the lower-center console as well as on the left side of the steering wheel (where I planned on installing this DRL switch). I really liked the “stealthy” nature of the switch since it blended in with OEM (not some obviously non-matching universal aftermarket switch). The switch came with a pre-wired pigtail harness to make installation just that much easier for DIY. I placed an order and 2 weeks later it was delivered.
As far as the switch itself goes, the build quality felt good, the push button action matched OEM, and the dimensions and attachment points were correct. Zero mods were required to install the switch into the dash panel – it snapped into place using the same tabs that the Cargo Switch (and the switch blank next to it) used. I did a dry fit to see how it actually looked, and when installed in the dash panel it looked perfect:
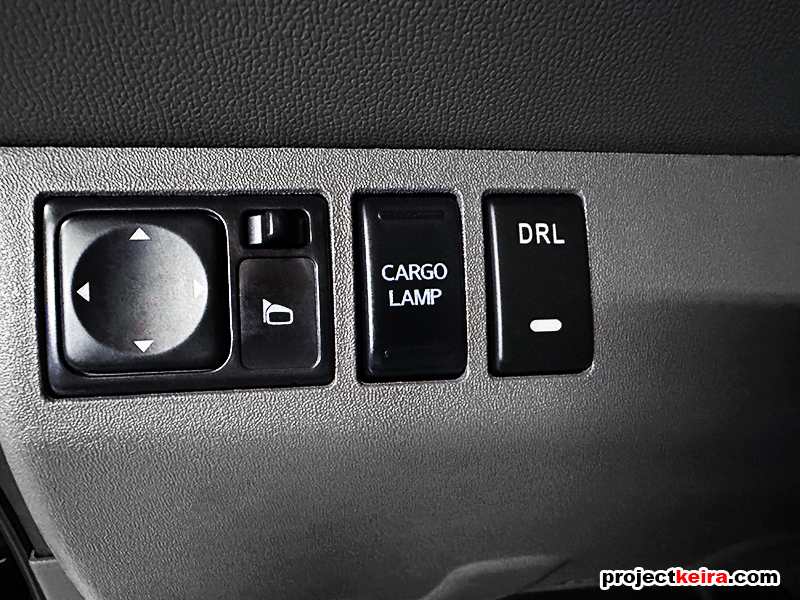
So far so good! But wait… when it came time to test the wiring and switch functionality, I discovered that the backlighting was way too bright for my tastes! Here’s a comparison of the un-modified DRL switch and the OEM Cargo Lamp switch on the Frontier dash with illumination on:
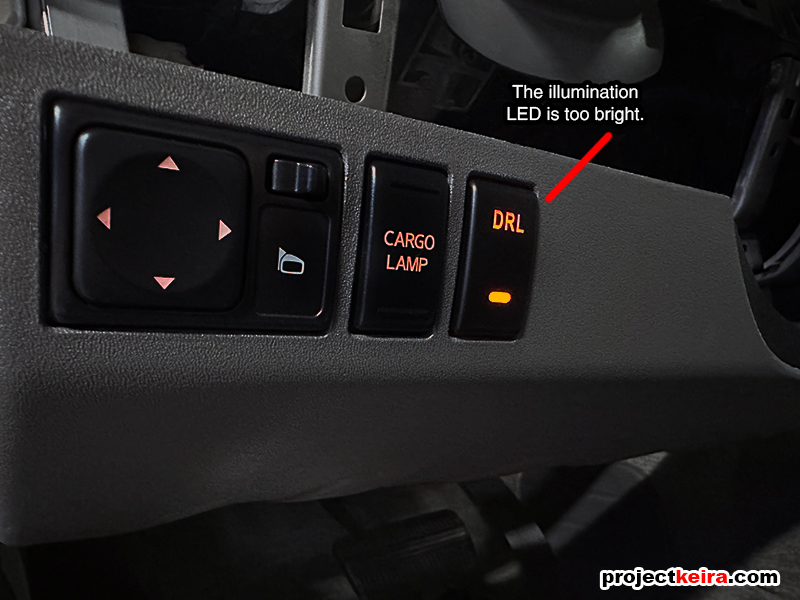
I really wanted the “DRL” illumination here to match the other OEM switches, so I took apart the DRL switch to get a look at the inner workings to see how I could reduce the brightness of the backlighting. With the help of a few prying tools, I took the switch apart and with some multimeter testing I identified the function of each of the 2 LEDs on the circuit board (the Sharpie labels are mine):
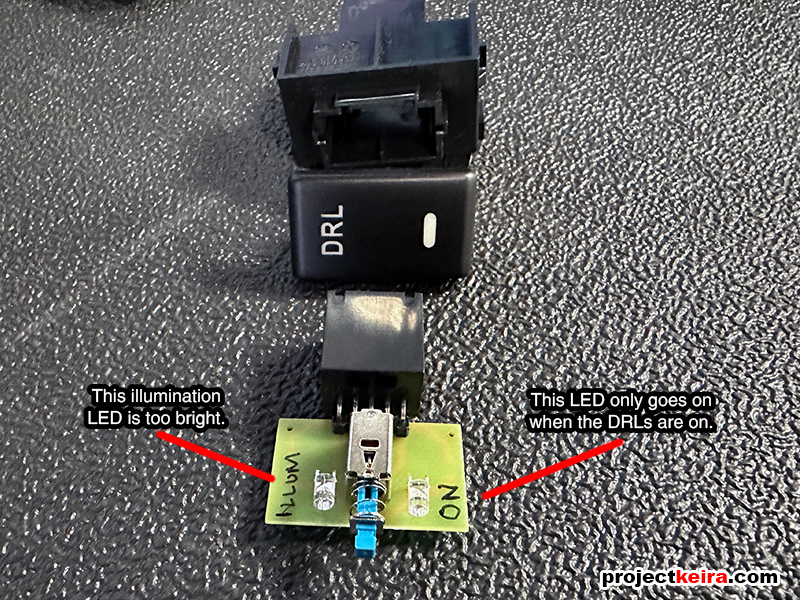
At first, I was debating on how to reduce the brightness of the “illumination” LED (Should I use paint to tint it? Add a resistor?) but then when I thought about how I initially wanted the switch to work. It turns out that the “illumination” LED was not needed at all. Instead, the “on” LED should provide enough brightness to also shine through the “DRL” lettering with just enough light to have it match the cargo lamp switch intensity. So, I just snipped the contacts of the illumination LED to disable it, and my suspicion/guess turned out to be right – the “DRL” lettering now matched the cargo lamp switch lighting perfectly:
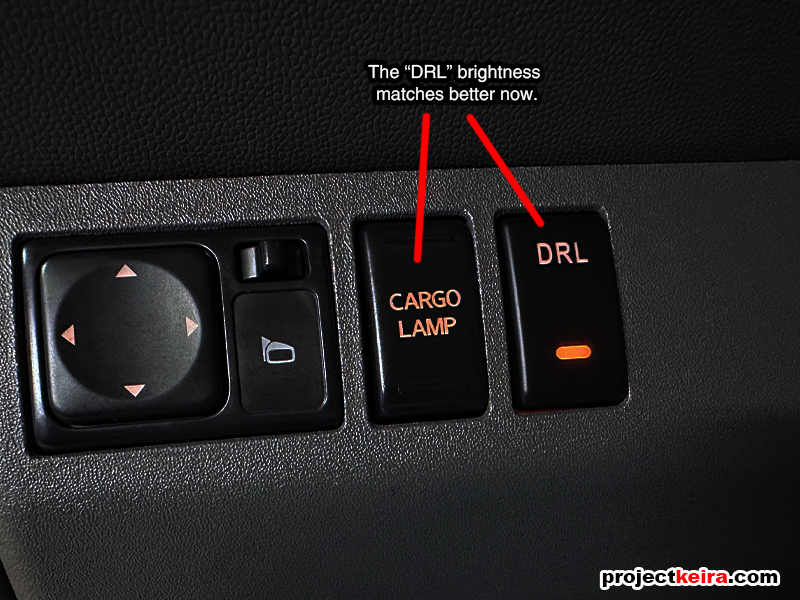
With the DRL switch lighting sorted out, the only thing left was to connect the DRL switch to the output wire leading to the C-DRLs (which I already pre-wired back when I installed the headlamps.)
So, to recap –the new DRL switch functions as follows:
-
Auto-On: The DRL switch is a mechanical two-position type so it does not reset when I turn the truck on or off. In other words, I can leave the DRL switch in the “ON” position, I do not have to turn them on each time I start the vehicle.
-
Auto-Off with Vehicle: KEY ON sends power to the DRL switch. KEY OFF cuts power. I did not go directly to 12V+ because I wanted the DRLs to automatically turn off when I turn the truck off.
-
Daytime Switch Illumination: The DRL light and DRL text will light up when the switch is toggled ON.
-
Nighttime Switch Illumination: When I turn the light stalk to ACC or Headlight ON, the DRL switch will illuminate regardless of switch position since the C-DRLs are normally on with the parking lights and with the headlamps anyways.
So that’s it. Now I can have the DRLs on whenever I want, without having to turn the parking lights on, without having the gauge cluster illumination turn on, and without changing the night/day mode on my head unit!
