Watchdogs: Garmin Dash Cam Mini Combo
Let’s cut to the chase – a lot of people these days drive like crap. Too many people distracted by their phones, traffic stops seemingly not as common as they used to be, and everyone seems like they’re in a hurry all the time. YouTube is full of dash cam videos of these morons! Anyhow, after a close call with a distracted driver last winter, I decided it was time (kinda) to equip the truck with a dash cam system.
I had been researching dash cams for a while now from brands like Viofo, Thinkware, Rexing, and BlackVue. A key detail I was looking for was a compact size; the typical dash cam size was always a concern for me as the front camera would need to be mounted below the OEM dot-matrix tint on my Frontier’s windshield and I didn’t want a bulky electronic device obstructing my view. Of the current offerings available, the BlackVue DR970X-2CH was nice and compact – but its $499 MSRP and way too many features than I wanted/needed was a no-go. I wasn’t looking for a built-in WIFI hotspot, 24/7 cellular connection, cloud storage, etc. I just wanted a simple, 2-channel system (front and rear cameras) with a small footprint, HD resolution, optional parking mode, and that’s it.
Then in September 2024, Garmin released the new Dash Cam Mini 3. I had the previous Mini 2 on my short list of possible choices, so when the updated Mini 3 was available I bought one immediately… then it just sat in the garage in a box for another 3 months (that’s why I said “kinda” in the intro paragraph). I still needed a second camera to get the 2-channel system I wanted, and about 1 month ago I found a deal on the previous-model Garmin Dash Cam Mini 2, so I bought that, too (more on why I bought this later). With two cameras ready, my 2-channel dash cam system could now be installed.
QUICK LOOK
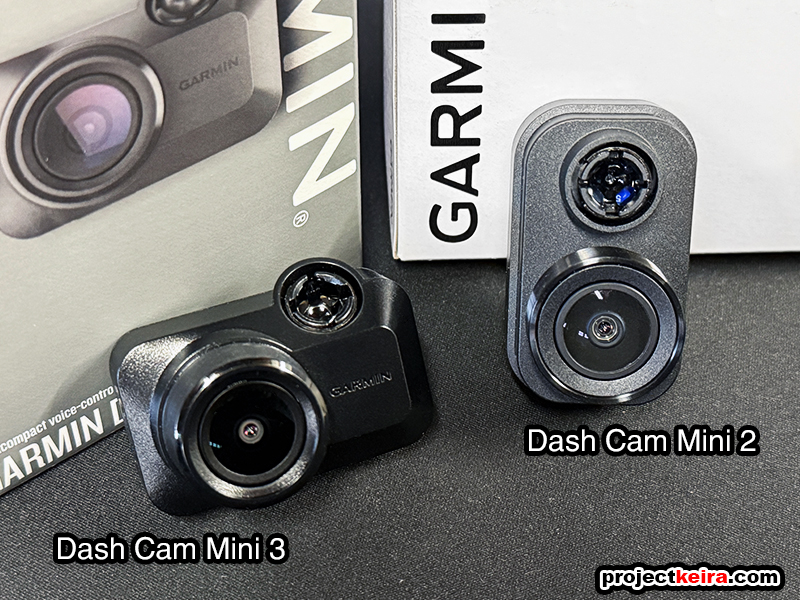
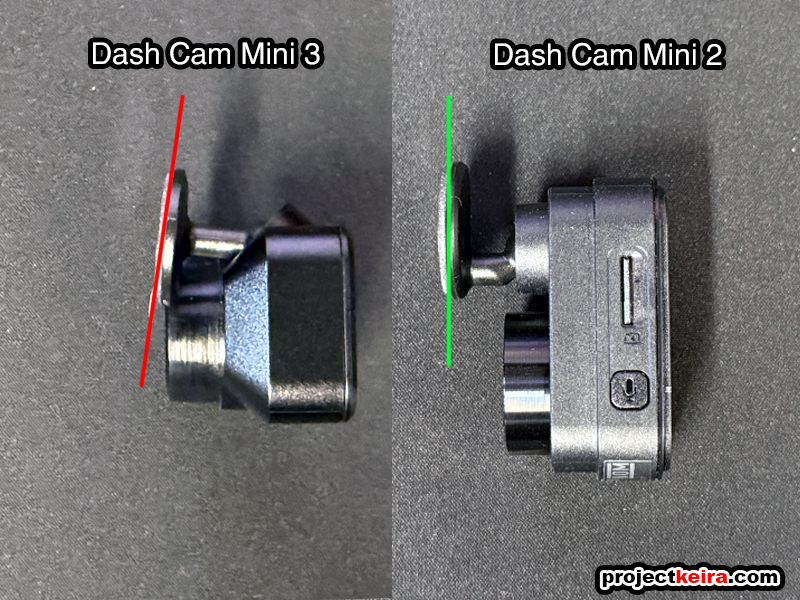
First let’s look at the cameras, starting with the new, improved Garmin Dash Cam Mini 3. The Mini 3 is probably the smallest dashcam on the market, with its small, horizontal shape that measures just 1.24” tall, 2.05” wide, and 0.8” thick. The Mini 3 weighs a feather-light 30g (w/mount and microSD card). The Mini 3 is really, really small – ideal for me to use as my forward camera (channel 1) since it is least likely to become an obstruction on my windshield.
For the rearward camera (channel 2) I went with the previous-generation Garmin Mini 2. The Mini 2 might not be as small as the Mini 3, but it is still a very small dash cam overall – just 2.09” tall, 1.22” wide, and 1.14” thick and weighing 32g. Unlike the Mini 3, the Mini 2 has a vertical orientation, and has a micro-USB port for power (the Mini 3 is USB-C). The vertical orientation of the Mini 2 is an important feature (explained later, below).
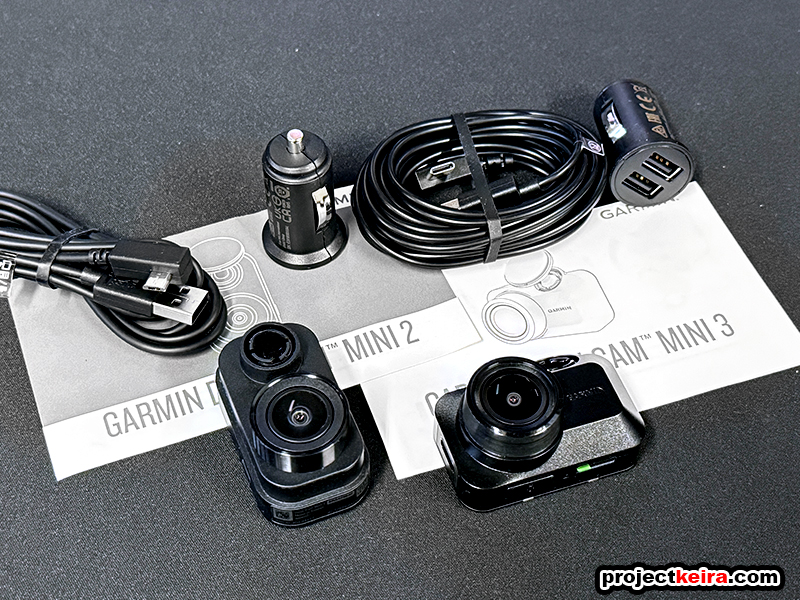
Both Mini 3 and Mini 2 cameras feature 1080p HD resolution with High Dynamic Range (HDR) @30-FPS; an internal G-sensor (for incident detection); GPS with selectable time/date/speed stamp; automatic loop recording; voice control; parking mode; and app-based setup. Cloud storage is optional. Both include long power cables (USB-C for the Mini 3 and micro-USB for the Mini 2), 2-port 12V USB charger, and paper manuals.
Due to both cameras’ miniscule dimensions, they also feature minimal yet simple physical controls: both feature a large and easy to use “save” button, an audio mute button, and easily accessible microSD card slots (bottom of the Mini 3, side of the Mini 2). There are no built-in screens, but the Garmin Drive app (iOS and Android) provides live-view and settings adjustments in real-time. MSRP is $149.99 for the Mini 3 and was $109.99 for the Mini 2 (recently discontinued but there are still many available from third party sellers). Additionally, in each camera I also installed a PNY 512GB Class 10 microSDXC card (the maximum size supported).
FRONT CAMERA: Garmin Dash Cam Mini 3
I chose the Mini 3 as my forward-facing camera because it’s the latest model with a quick-release adjustable ball mount at a 45-degree angle, making it easy to attach to the windshield. Its horizontal orientation lets it hide behind the rearview mirror, and the right-side lens positions it close to the windshield’s centerline.
Installing the Mini 3 was simple: peel and stick the mini ball mount to my Frontier’s windshield after cleaning it with glass cleaner. The ball mount holds the camera securely but allows for easy removal without disturbing the mount:
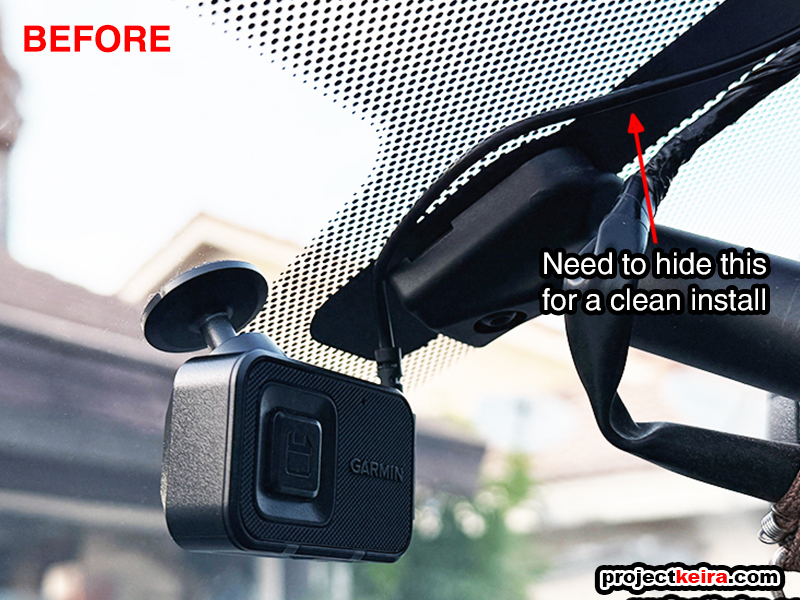
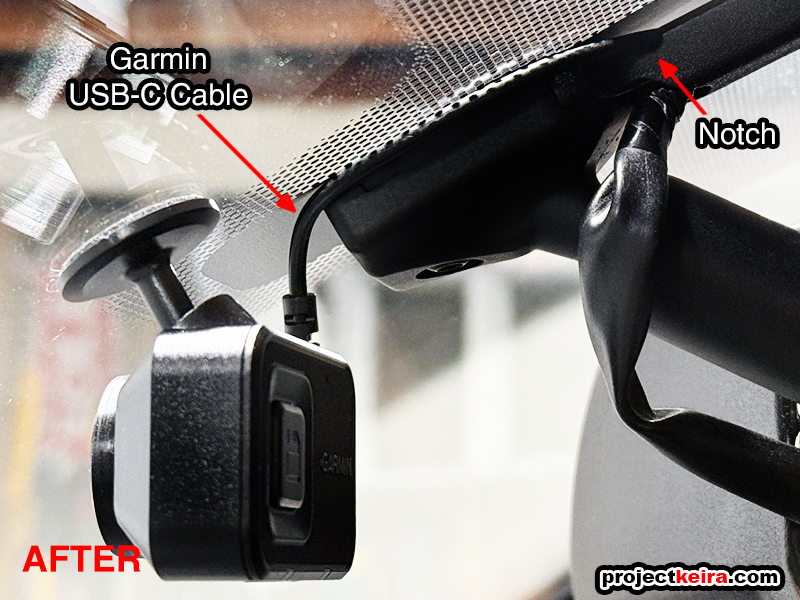
The Mini 3 uses a USB-C cable on the right side, which aligns well with the Frontier’s OEM rearview mirror wiring; to hide the extra cable, I cut a small notch on the left side of the rearview mirror wiring cover:
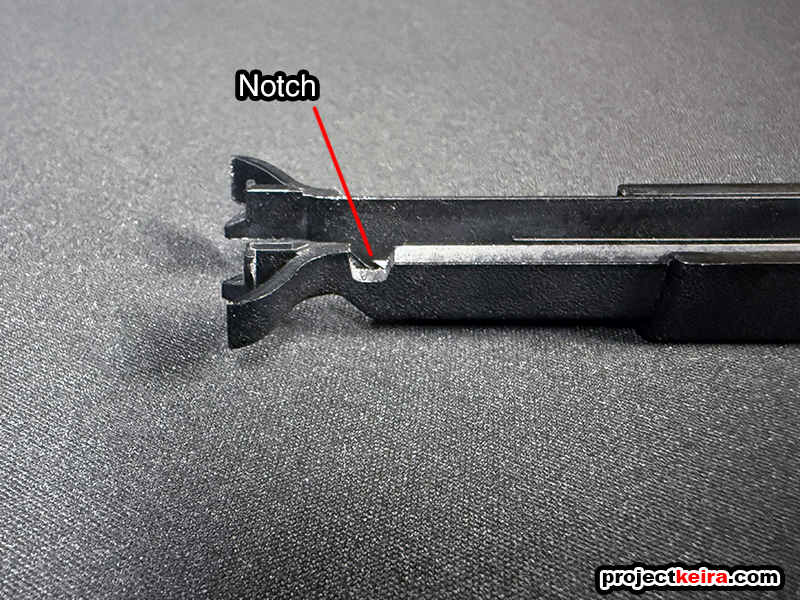
This little notch allowed me to hide the USB-C cable and make the installation as discreet as possible:
The other end of the Mini 3 power cable was routed to the driver’s side kick panel area. Instead of using the 12v USB power supply included with the dash cams, I hard-wired in a small dual USB-A power supply that provided 2x 5V/6A (30w) USB ports:

REAR CAMERA: Garmin Dash Cam Mini 2
For the rear view, I decided that the still capable Mini 2 would be a better choice as the rear-facing camera – and here’s why: unlike the Mini 3, the Mini 2 mounting ball attachment point is at the front of the camera housing; this means I can have the adhesive mount at 90-degrees vertical, to match the vertical rear window of the Frontier:
This isn’t physically possible with Mini 3 as the ball mount doesn’t have enough articulation to reach 90-degrees vertical; during some fitment testing the Mini 3’s view with the “default” angle meant that half of the picture was of my tonneau cover! However, with the Mini 2 I could position the lens so that only the bottom ¼ of the picture was tonneau cover, meaning more for the rear camera to see (the screenshots later will show this).
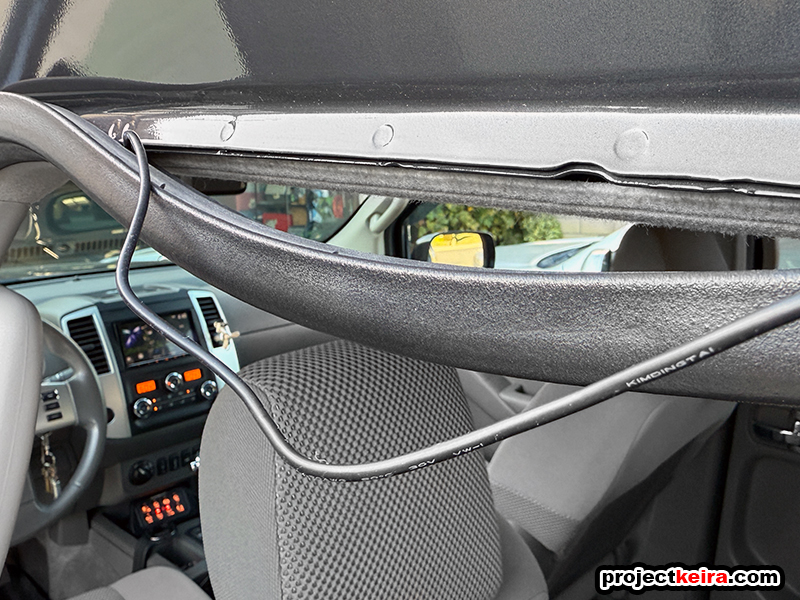
Before I installed the Mini 2, I had to run its micro-USB cable from the driver’s side kick panel area to the back of the headliner:
I decided to position the Mini 2 high up on the left side of the sliding window (when looking at it from inside the cab). Not only does this position capture more of the driver’s side blind spot, but it also does not impede the opening of the sliding window:

Installation of the Mini 2 onto the rear window was as simple as the Mini 3: peel and stick the mini ball mount to my Frontier’s rear window after cleaning it with glass cleaner, connect the power cable, and that’s it.
TESTING AND USAGE
After installation I took a drive around town to check the camera angle and get some sample footage. I only planned to drive around for about 10 minutes… until I realized too late that it was 5:00pm and everyone was driving home at the same time.
I wired the dash cams’ USB power supply to switched 12V. After starting the Frontier up, both cameras gave a notification beep telling me they were powered on and recording… for some reason the Mini 2 was the first to beep (within 5 seconds of vehicle start up) followed by the Mini 3 almost immediately after. Suffice to say, startup time for both cameras is very quick and completely hands-free.
While driving I barely noticed the LED indicators on the dash cams. The red LEDs are very small and discreet; the front Mini 3 LEDs are just hidden by the lower edge of my rear-view mirror, and the rear Mini 2 LEDs are a mere speck when seen through the rear-view mirror’s reflection (further testing later at night confirmed that the LEDs are not a distraction at all).
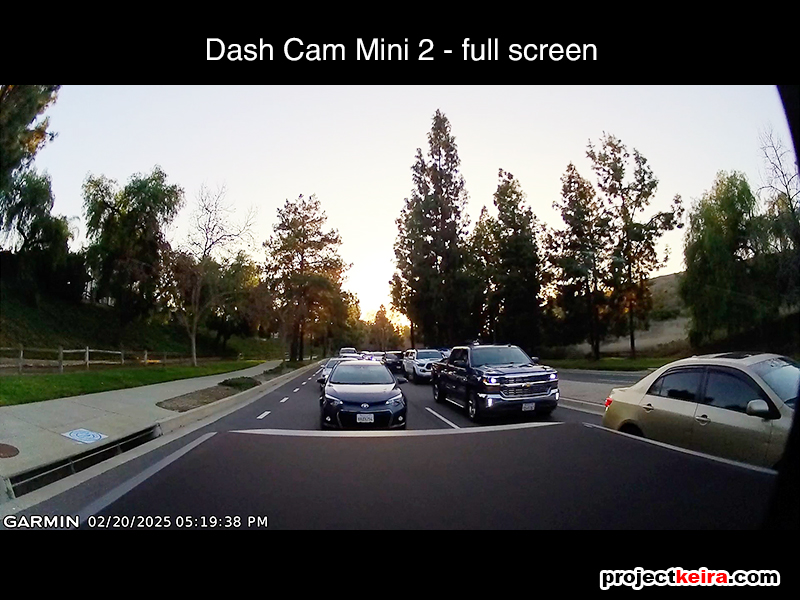
I did not upload any video, but I did take a couple of quick screenshots to show the recording view. Let’s look at the Mini 3’s view:
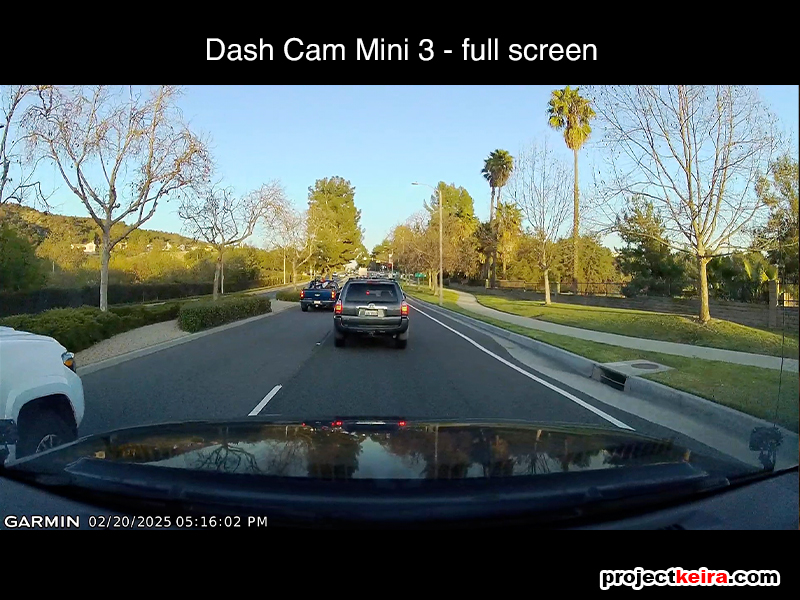
The Mini 3 records nice footage, with accurate colors and clear picture quality. From the image above you can see that the Mini 3 has excellent coverage; the road I was on is a divided 4-lane main street with bike lanes on both sides plus a 20-foot-wide center divider. The brick wall to the right is a good 25-30-feet away from my position on the road), same with the hedge on the opposite side of the road. The vehicle in front of me was about 1-1/2 car lengths away. The photo above doesn’t show it, but I can read the license plate from the actual video footage.
As for the Mini 2 in the rear, the results are similar (which is good!). The screenshot was taken roughly 3 minutes later, the sun was already going down so that explains the difference in the color saturation and image brightness when compared to the Mini 3. Horizontal coverage is excellent as well, and if you look to the right of the image, you’ll just barely see the window frame for the center window – something unavoidable thanks to the Frontier’s rear sliding window design, but not an issue and not an obstruction for the camera’s view:
One neat feature of the Garmin dash cam family is that you can “link” multiple cameras together in the Garmin Drive app. Once cameras are linked together, the app is no longer needed for daily use. If I tap the “Save” button on the Mini 3 to save incident footage, it will automatically tell the Mini 2 to also save incident footage synced to the front cam. If I push the Mini 3’s “Mic OFF” button (so the camera won’t record sound), the Mini 2 will also deactivate its microphone as well. This linking feature makes the Mini 3 + Mini 2 a true multi-channel system, and not just two separate cameras plugged in at the same time. Timestamp footage is synced together when viewing through the app, or at home on a PC via the microSD cards.
For now, I only have the Mini cameras set up for driving usage only, but I did buy the Garmin Constant Power Cable for possible use in the future:
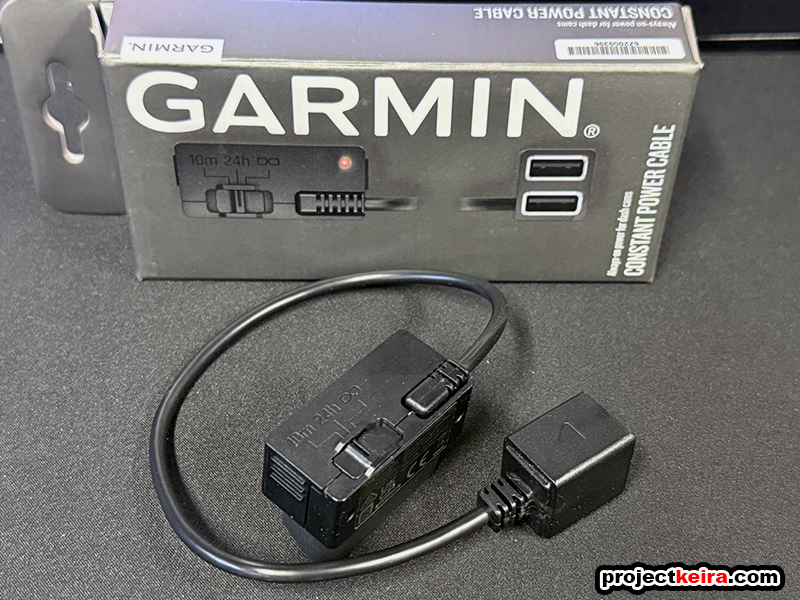
The Constant Power Cable plugs into the OBD2 port and not only provides power to two Garmin dash cams, but it also features a selectable “parking mode” with which the cameras will stay on after I park and leave the Frontier. The built-in G-sensor will trigger the cameras to record footage in case of an incident while I am away from the truck. I still have my UltraGauge plugged into the OBD2 port, so if ever I decide to add the parking mode feature in, I’ll have to remove the Ultragauge.
GOOD ACTION… CAMS
So far, I am very happy with the Garmin Dash Cam Mini 3 and Mini 2 combo. Their compact size ensures that I don’t have some bulky black plastic box attached to my windshield/rear window. The recording footage is solid, and saving incident footage is fast and flawless.
Bonus note: I can finally put this project to bed, and throw away the box that was sitting in the garage for a few months 😬