Laser Rays.
Second generation Nissan Frontiers (2005-2019) halogen housings are really, really bad! With a stock halogen bulb they barely put enough light on the road, and over the years any attempt at using HID or previous generation LED bulbs resulted in glaring, horrible light scatter and less useful “on the road” light. The only “real” upgrade was to go with a full projector retrofit, which costs anywhere from $200 to DIY up to $650+ for ready-made units.
Aside from a full retrofit, for me the only viable alternative solution available was to swap my headlamp bulbs to some Phillips CrystalVision halogen bulbs (not much brighter than OEM but at least the headlamp color wasn’t a dim amber anymore) and swap out my OEM fog lamps to a set of super bright Rigid Industries LED lamps. Basically my fix was to aim the Rigid’s so that I could actually use their light as my main “headlamp”, and it worked – but it wasn’t exactly ideal and not the right way to fix the issue.
Fast forward to October 2018, I went ahead and ordered a set of Katana 9007 LED Headlight Bulbs. Original price was $47.99, but thanks to some Amazon credit I only forked out $20. Upon arrival I immediately started analyzing them because I had a genuine interest in finally being able to upgrade my headlamps. Sure – I could have done a full headlamp retrofit years ago, but to be honest, I haven’t seen a retrofit that I actually liked. Okay – let’s get to it.
Installation Notes
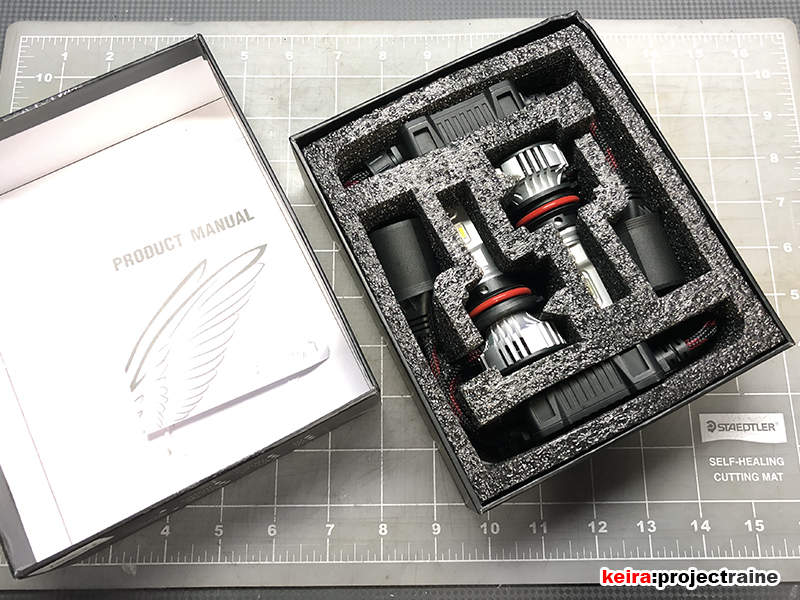
Upon delivery, the Katana LED kit comes in a foam padded box, with a pair of the LED bulbs, a pair of LED drivers, a totally useless 1.5mm hex wrench, and some generic “instruction manual” that doesn’t even apply to our headlamp type. Out of the box the LED drivers have the 9007 Socket pre-installed (nice), but the drivers and LED bulbs themselves still need to be connected together by simply attaching the two ends and turning the threaded lock ring until the bulb and the driver are secure.

With the first set of bulbs I received one of the bulbs was not in the correct orientation. The alloy bulb housing uses a separate molded mounting ring that can be rotated around the housing to position the LEDs, with a small 1.5mm hex screw holding the ring in place. Because these are high/low LED bulbs, the orientation of the LEDs must be in the correct position – take a look at the photo below:
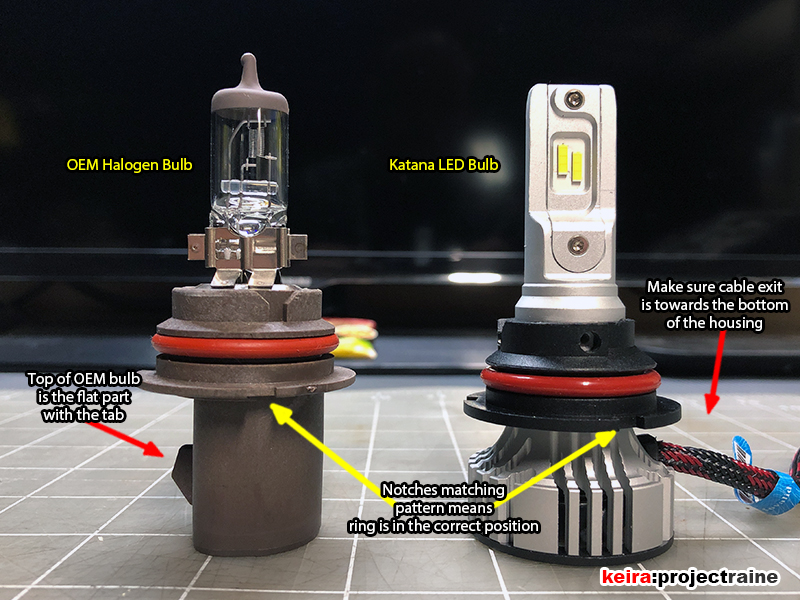
First, the metal bulb housing must be vertical, with the LEDs positioned on the sides of the housing. Second, make sure that the LEDs are positioned with the upper LED farther forward than the lower LED:

When the bulbs are correctly positioned/oriented, you should have the wiring harness coming out from the bottom of the LED housing; if you have the LED bulbs positioned with the wiring harness at the top, it will not work correctly because when you flick the lights to high beam, the light beam will actually move downward! Aside from making sure the LEDs are positioned correctly, you don’t need to do anything else.
The installation is basically the same as changing regular halogen bulbs. Everything is plug and play, with no added wiring/relays needed. One thing you do have to do when installing the LEDs is to pull the black mounting rings off, slide the headlamp lockrings (white plastic rings at the back of the OEM headlamps) over the bulbs, then reinstall the mounting rings. You only have to do this because the LED fan assembly is too large to fit through the white lockrings. Oh, and if you’re good you can get the passenger side bulb replaced without moving the battery, but if not well… then move the battery.

How-To Aim Your Headlamps
After installing LED bulbs it is imperative that you check and adjust your headlamp aim! This is especially true when it comes to upgrading from the OEM stock halogen filament bulb. The OEM headlamp assembly and reflector is designed specifically for use with OEM stock halogen filament bulbs in terms of fitment and brightness. When you change to something that outputs more light with a totally different light source compared to regular halogen filament bulbs you will just add brightness – but you won’t gain full advantage of the extra output if your headlamps aren’t aimed properly. To learn how to aim your headlamps, go here.
Bulb Comparisons and Observations
Animated photos first, with description and notes below the photos.
Bulb Name: OEM Sylvania 9007 (HB5)
Type: Basic Halogen
Price: About $18/pair
Notes: This is your basic OEM halogen light bulb. The output color is a warm white (somewhere around 3000K) and brightness is barely serviceable in our trucks. The low beam pattern is a standard rectangular shape with some peaks at the hot spots, and the high beam upper cutoff is relatively flat.
Bulb Name: Philips Crystal Vision 9007
Type: Premium Halogen
Price:About $22/pair
Notes: This is what I’ve been running in my headlamps for the last 4 years (still on the first pair too!). For a few dollars more than OEM, the Crystal Vision’s output color is around 3700K and brightness is a slight improvement over OEM, with a similar low and high beam pattern.
Bulb Name: Katana 9007
Type: LED
Price:$47.99 on Amazon.com
Notes: There is no question that the Katana LEDs are much, much brighter than halogen. The color temp difference compared to halogen is noticeable at 6500k, but at the same time since the light output is brighter, you can see more light scatter outside of the beam hot spots.

All Three Bulbs: Low-Beam Comparison:
When comparing all three low-bream bulbs back to back, you can see that when compared to the OEM halogen, the Philips Crystal Vision is definitely brighter, with a very similar but slightly taller beam shape. However when you see what the Katana LEDs do, it’s very noticeable. The light output of the Katana’s are much brighter and with a taller pattern, with a lot of added useable light below the hot spots. There is some visible scatter above the beam cutoff, but if you look at the reflected scatter on the higher metal door beams, it’s about the same as the Philips (this is a good thing).
All Three Bulbs: High-Beam Comparison: When compared to the OEM high beam, the Crystal Visions are projecting thinner but slightly brighter and whiter. When it comes to the Katana LED bulbs, the results are similar to the low-beam comparison – the LEDs are much brighter, with a taller beam pattern and also a wider beam pattern. Above the beam cutoff there is noticeable light scatter, but we’re talking high-beam, when you’re using high beam properly you do want more light to see the road ahead.
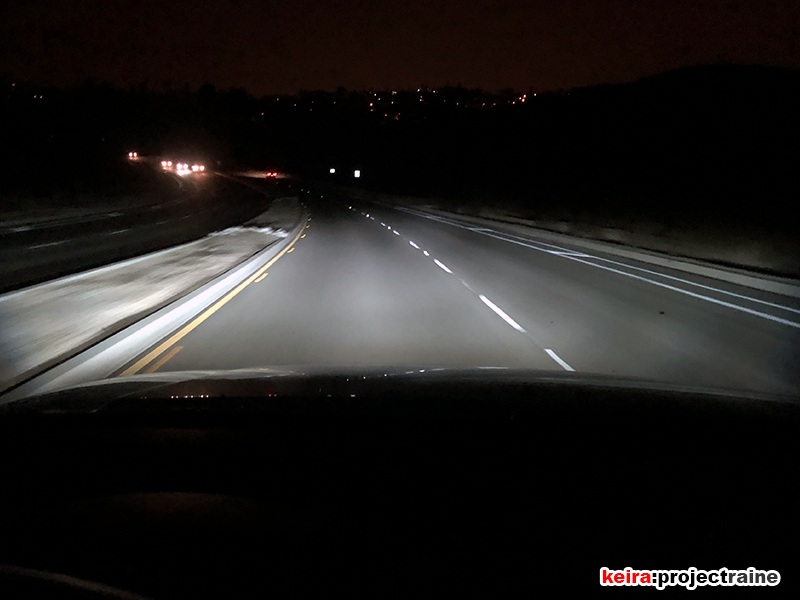
Driving Observations
With the beam comparisons done I went ahead and adjusted my headlamps aim again, until the Katana LEDs were aimed properly. From here I drove my truck for about 3 more weeks, making observations and (trying to) take photos to show “real world” results. I purposely removed my Rigid fog lamp fuse so that the only bulbs lighting up the road were the Katana LED low-beams. Here are some road photos:


Quality/Reliability
As far as build quality goes, the materials are pretty good. The alloy bulb housing is finished well, and the connectors are molded out of good plastic. The cables are thick and have a nice braided sleeve around them. The fitment in the headlamp housing is nice and snug, no tighter than regular halogen bulbs. Now about reliability… unfortunately when I got my first set of LED bulbs, 4 days after installing them one of the LED drivers mysteriously decided to fail.
The Katana bulbs come with a 1 year warranty, so I contacted Katana immediately and they honored the warranty with no questions asked. However, before I could get a replacement I had to literally remove both LED bulbs and drivers from my truck and cut all four wires (2 on the bulbs, 2 on the drivers) then send them a photo of it! In other words, all I needed was a replacement LED driver, but they couldn’t send me just a replacement driver… instead they had me destroy the entire LED kit (with photographic proof required) only to send me A WHOLE NEW REPLACEMENT KIT. Doesn’t make sense, but whatever. Also unlike the first LED set that I had in 2 days (Amazon Prime) the replacement second lED set was mailed through regular, super slow standard mail… so I was back using halogens for another 12 days before the replacement LED set arrived. The second set is what I’ve been running for the last 3 weeks, so far no issues.
Conclusion
I was one of those guys who would tell everyone that HID/LED bulbs suck in OEM halogen headlamp housings. Was I wrong? No, because at that time there wasn’t an HID/LED kit available that did what these Katana LEDs do inside halogen housings. Now it seems that LED technology/design has advanced to a point where they can be used inside standard, non-projector headlamps, and the Katana LEDs are a good example.
So as far as I’m concerned, the Katana LED bulbs are a viable upgrade. They aren’t perfect (if you want a dead flat horizontal cut-off, there is still nothing like a full projector retrofit) but after proper headlamp aiming I found that the Katana LED bulbs are very useable for daily driving. The light is bright, the beam pattern is pretty good, and aside from the slight scatter, these LEDs are a huge improvement over previous generation LEDs and definitely useable in our headlamp housings, unlike HID kits. Also, the price tag is very reasonable for the improvement gained, and a bargain compared to doing a full projector retrofit. Throughout the last 3 weeks I have not come across any oncoming traffic flashing their high beams at me, so that’s good sign.
